Author: crowan26

  • Projects Update: A Mystery Image, Bumper 3D Modeling, New Minecraft Ideas

    Projects Update: A Mystery Image, Bumper 3D Modeling, New Minecraft Ideas

    Quite a bit has been accomplished since my last check-in on this site. I’ve kept going on the Blender 3D modeling project of the Toyota Soluna (see the previous blog post for more details), finished Unit 3000 in the New Andaman Beach Villa project (Minecraft), and planning a new complex of forest-located builds on a smaller scale. Among all of this, Flames of Rebellion has cracked 43,000 words, and I predict it’s about halfway to completion now. On top of this, the AoPS Academic Year classes (Algebra 2 in this case) have now started back up. So as you can imagine, things have been a little bit busier than normal!

    I’ve also begun a completely new and unrelated project, which I’ll introduce with a single photo at the end of this post.

    The 3D Modeling Project

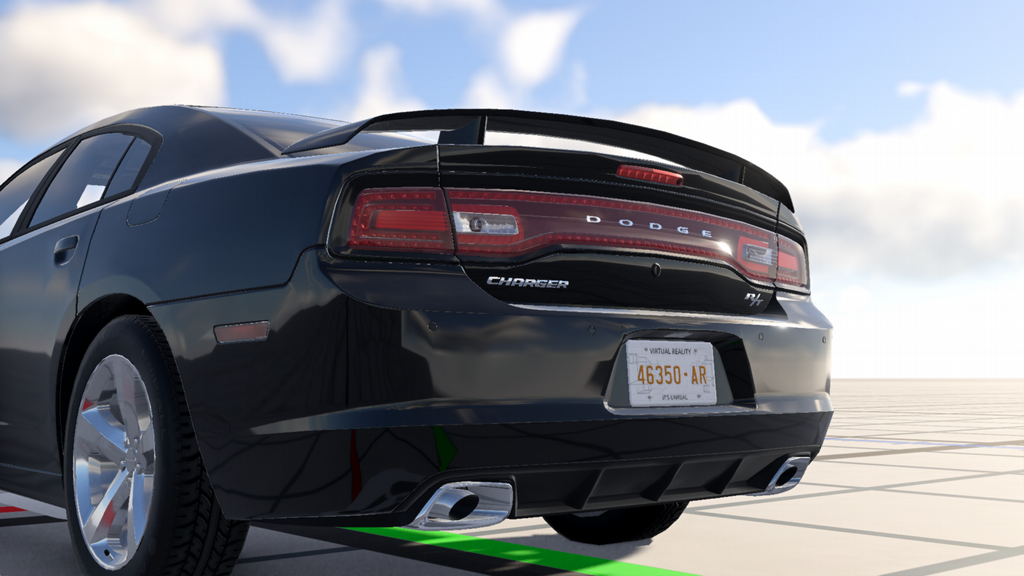
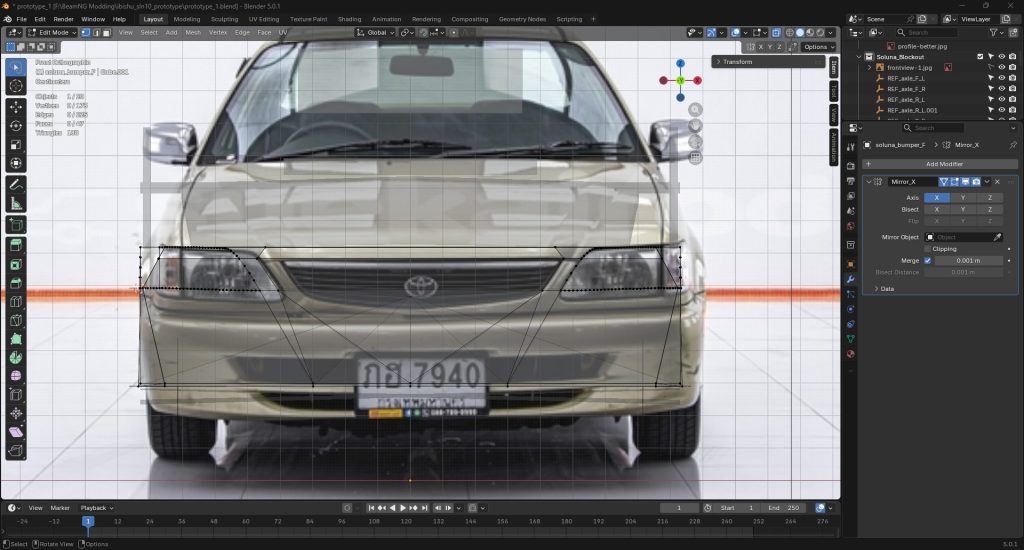
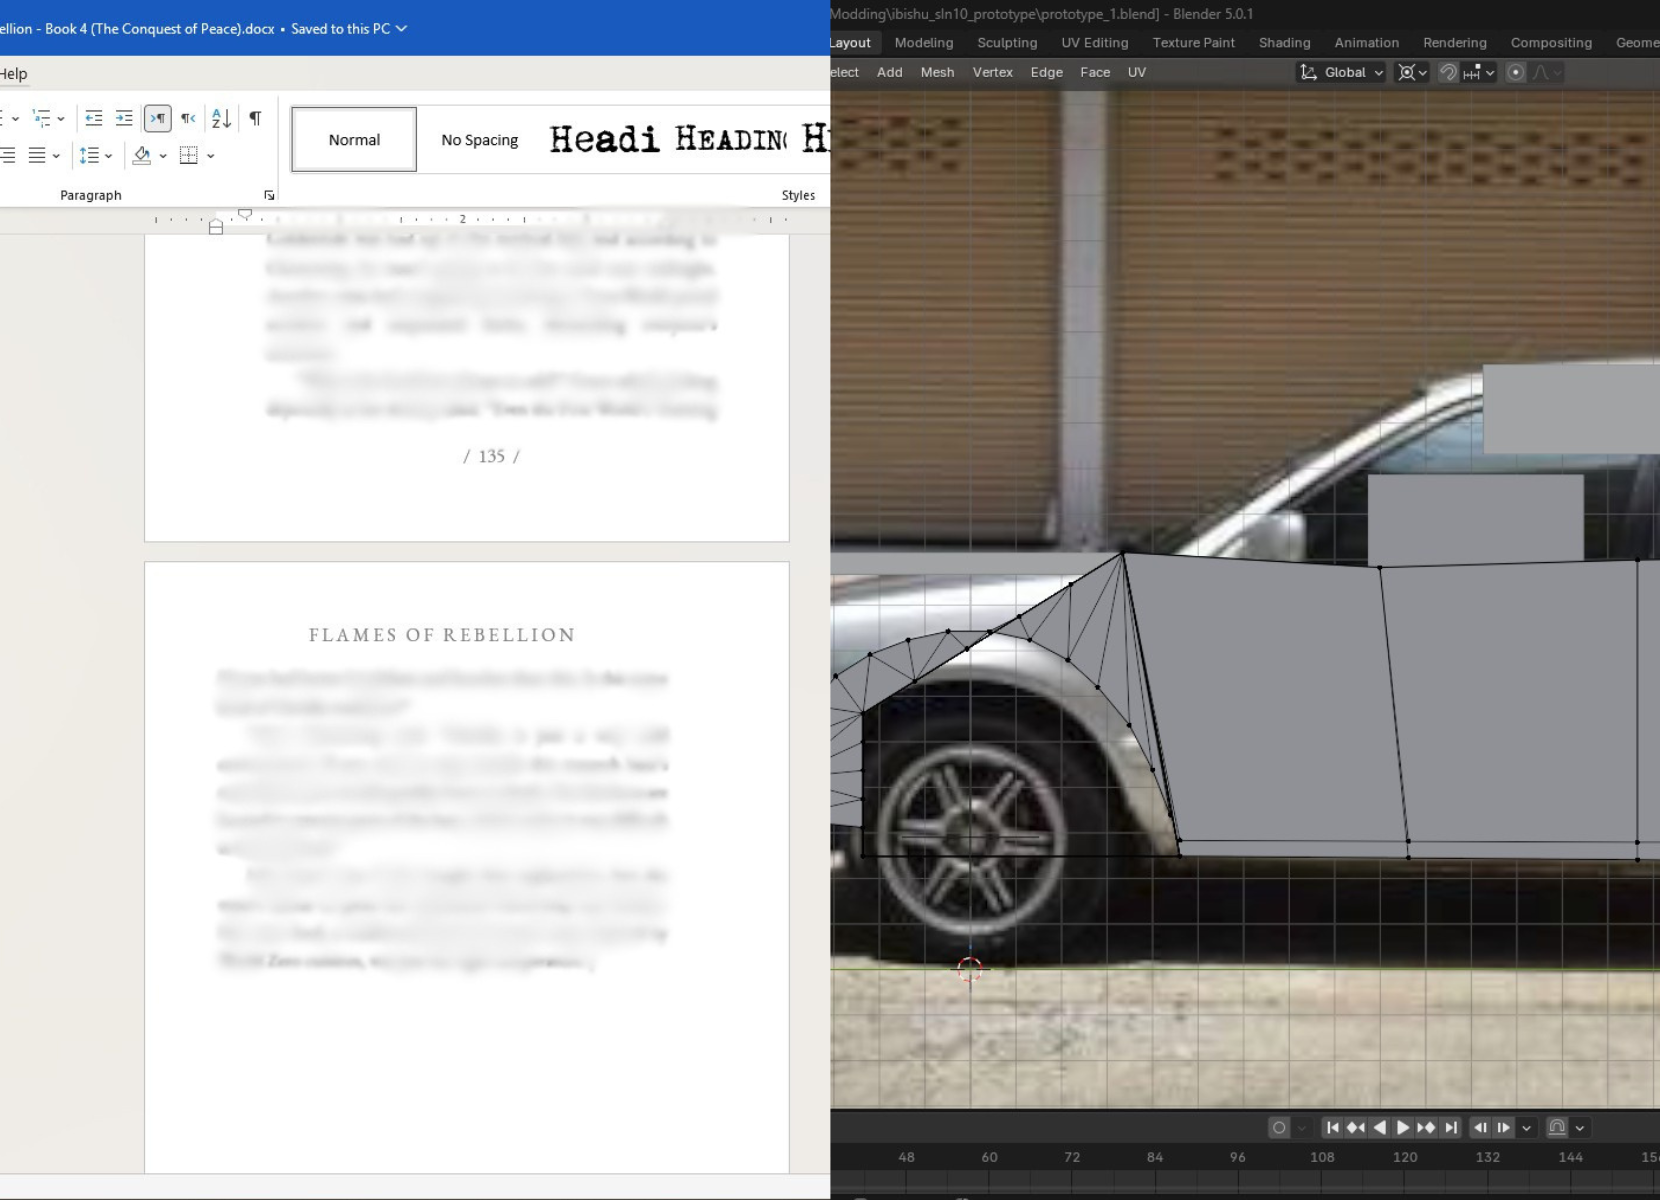
    The front view of the current 3D modeling process, allowing you to see the progress made on the headlight cutout area.

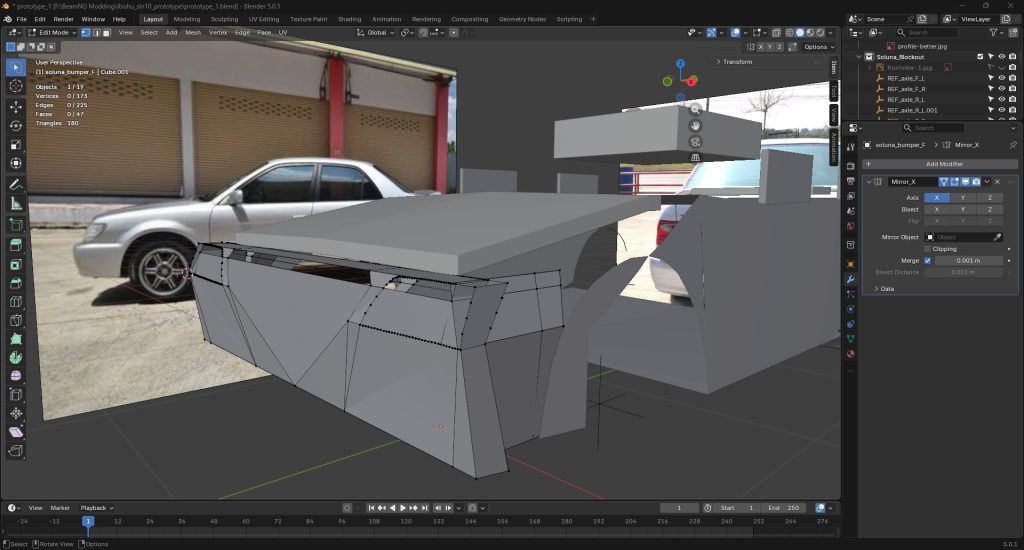
    I’ve taken a brief one-day break from going insane in Blender, but over the course of the past week I’ve made significant progress on the front bumper cutouts for the Soluna. On Tuesday, I finished the headlight cutout (or at least the inner portion), after comparing extensively against the photo and subdividing into hundreds of vertices to get the contour right. The grille cutout is also done, although it seems a little crude and I might have to go back and refine it later. The next step will be the turn signal cutout, which extends to the side and wraps around to the other end of the vehicle in the reference photos. Assuming nothing goes catastrophically wrong (which you never know with this project), it’ll probably be another 2-3 weeks before the bumper is done.

    Given the speed of this project, I’d probably re-calculate my estimate of finishing the 3D model to next spring or next summer. That gives me plenty of time to do the rear bumper, shape the hood and windshield, model the badges, model the openable doors, and actually set a working interior color (unlike some other Mercedes-Benz C250 mods where you can’t change the interior color!). Of course, the JBEAMING, SCREAMING, and UV MAPPING will need to be done after that, so time will need to be factored in for those advanced processes.

    Below is the closer side-view look at the image shown at the beginning of this section, and you can really see all the vertices I’ve added around the headlight cutout to fully shape the area.

    Minecraft Projects and Flames of Rebellion

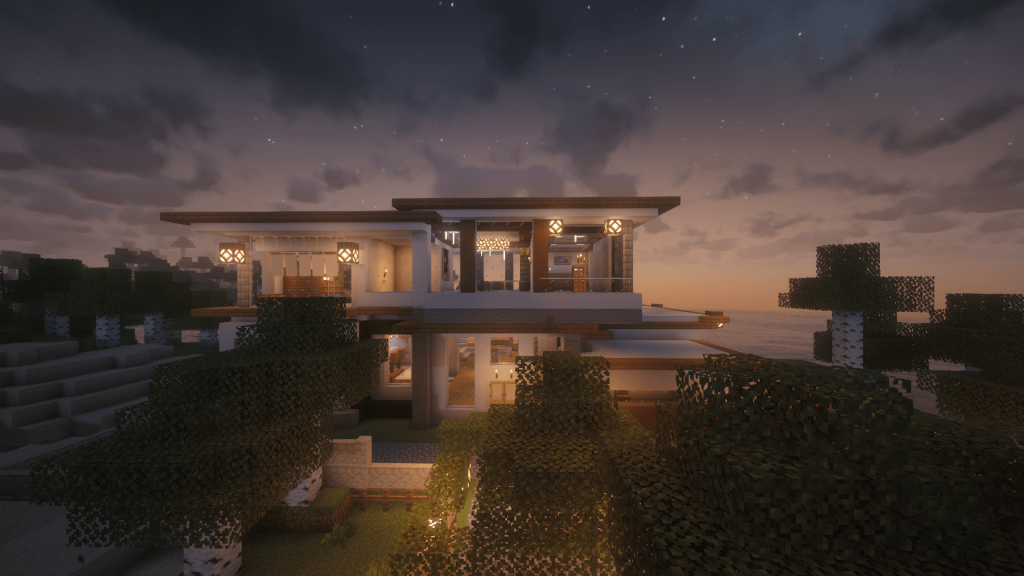
    Front view of the New Andaman Beach Villa #3000 at sunset

    Flames of Rebellion soared to over 43,000 words this week, with more coming every day. This places the book now at 192 pages, which is at about the halfway point considering that this will be another 380-400 page book. I just finished writing a highly intense scene involving Hikotage, who wound up stranded in World Zero after a serious Common Cause attack, and I’m now proceeding to get into some of the most tense parts of the book. I’m still on track for completing the writing portion around November-December 2026, with the publication date to be around January-February 2027 including cover design and proofreading.

    However, I can’t really get a definitive estimate on this, because the proofreading for the previous book consumed quite a bit of time (over 8 months) and caused quite the delay in getting the book out. I’m not sure what’s going to happen this time, but hopefully it won’t be a full eight months.

    On the subject of the Minecraft projects, I recently finished editing the tour video for New Andaman Beach Villa Unit 3000, and started crafting the floor plans for the next series of forest villas. The tour video is now posted on the official Minecraft Builds website, along with the complete photo gallery. I’m considering remastering the tour video for Unit 1000 as well, but this may not actually occur since I’ll be focusing on building the next few forest villas.

    That next project is set to be codenamed the New Andaman Enclave, and will feature much smaller one-story villas when compared to the lush beachfront ones. These will probably come in four to five configurations, both one-bedroom and two-bedroom, and will be nestled in a small complex with plenty of vegetation, right in the middle of the forest. My plan right now is to build four villas per configuration, making a total of around sixteen villas, but this may change depending on the H situation and how much time I have to create these villas. Along with various competing BeamNG scenario projects and calamitous C250 photo-taking sessions, these Minecraft projects may be temporarily pushed to the back burner.

    The Mystery Project

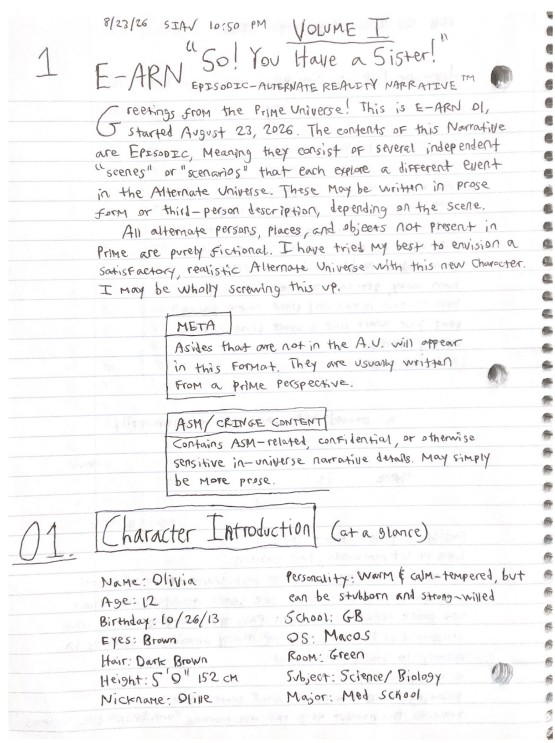
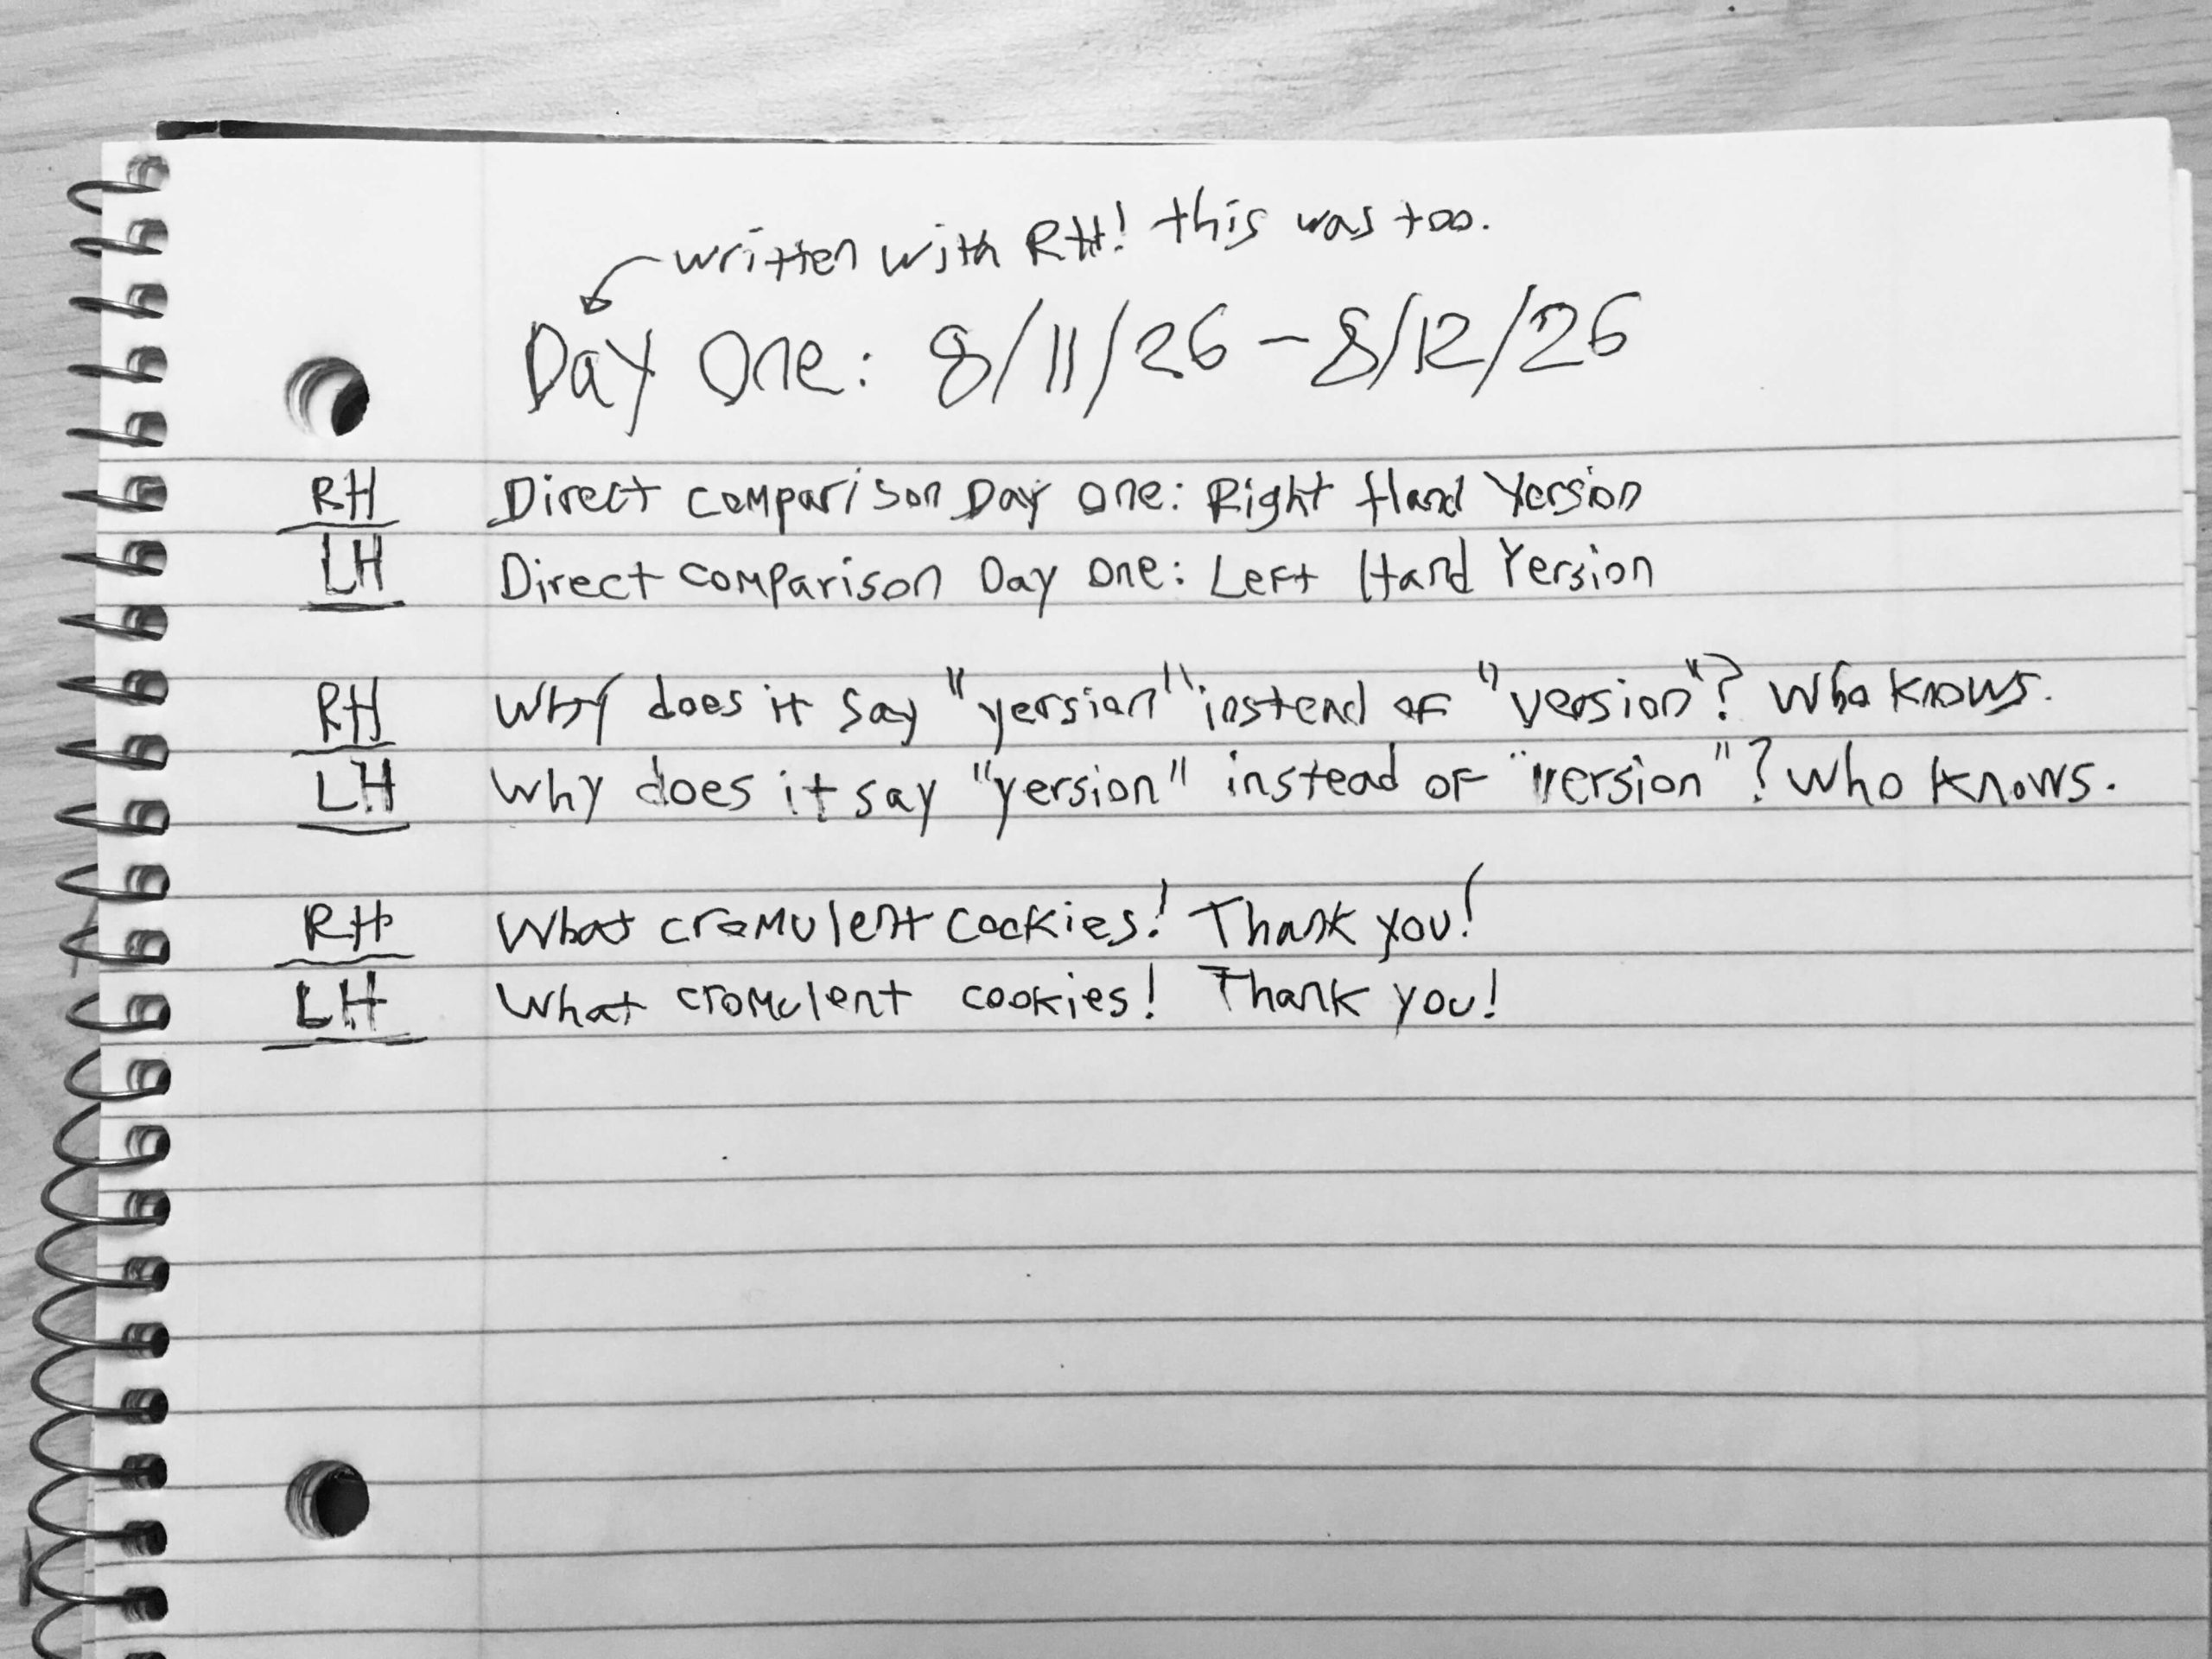
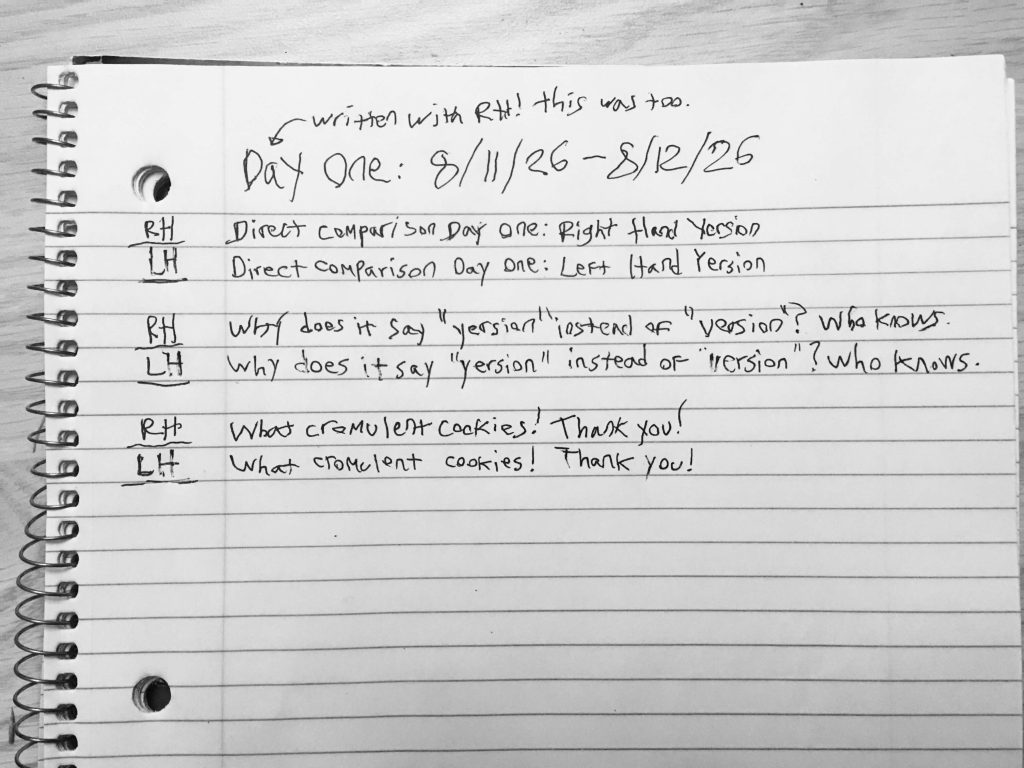
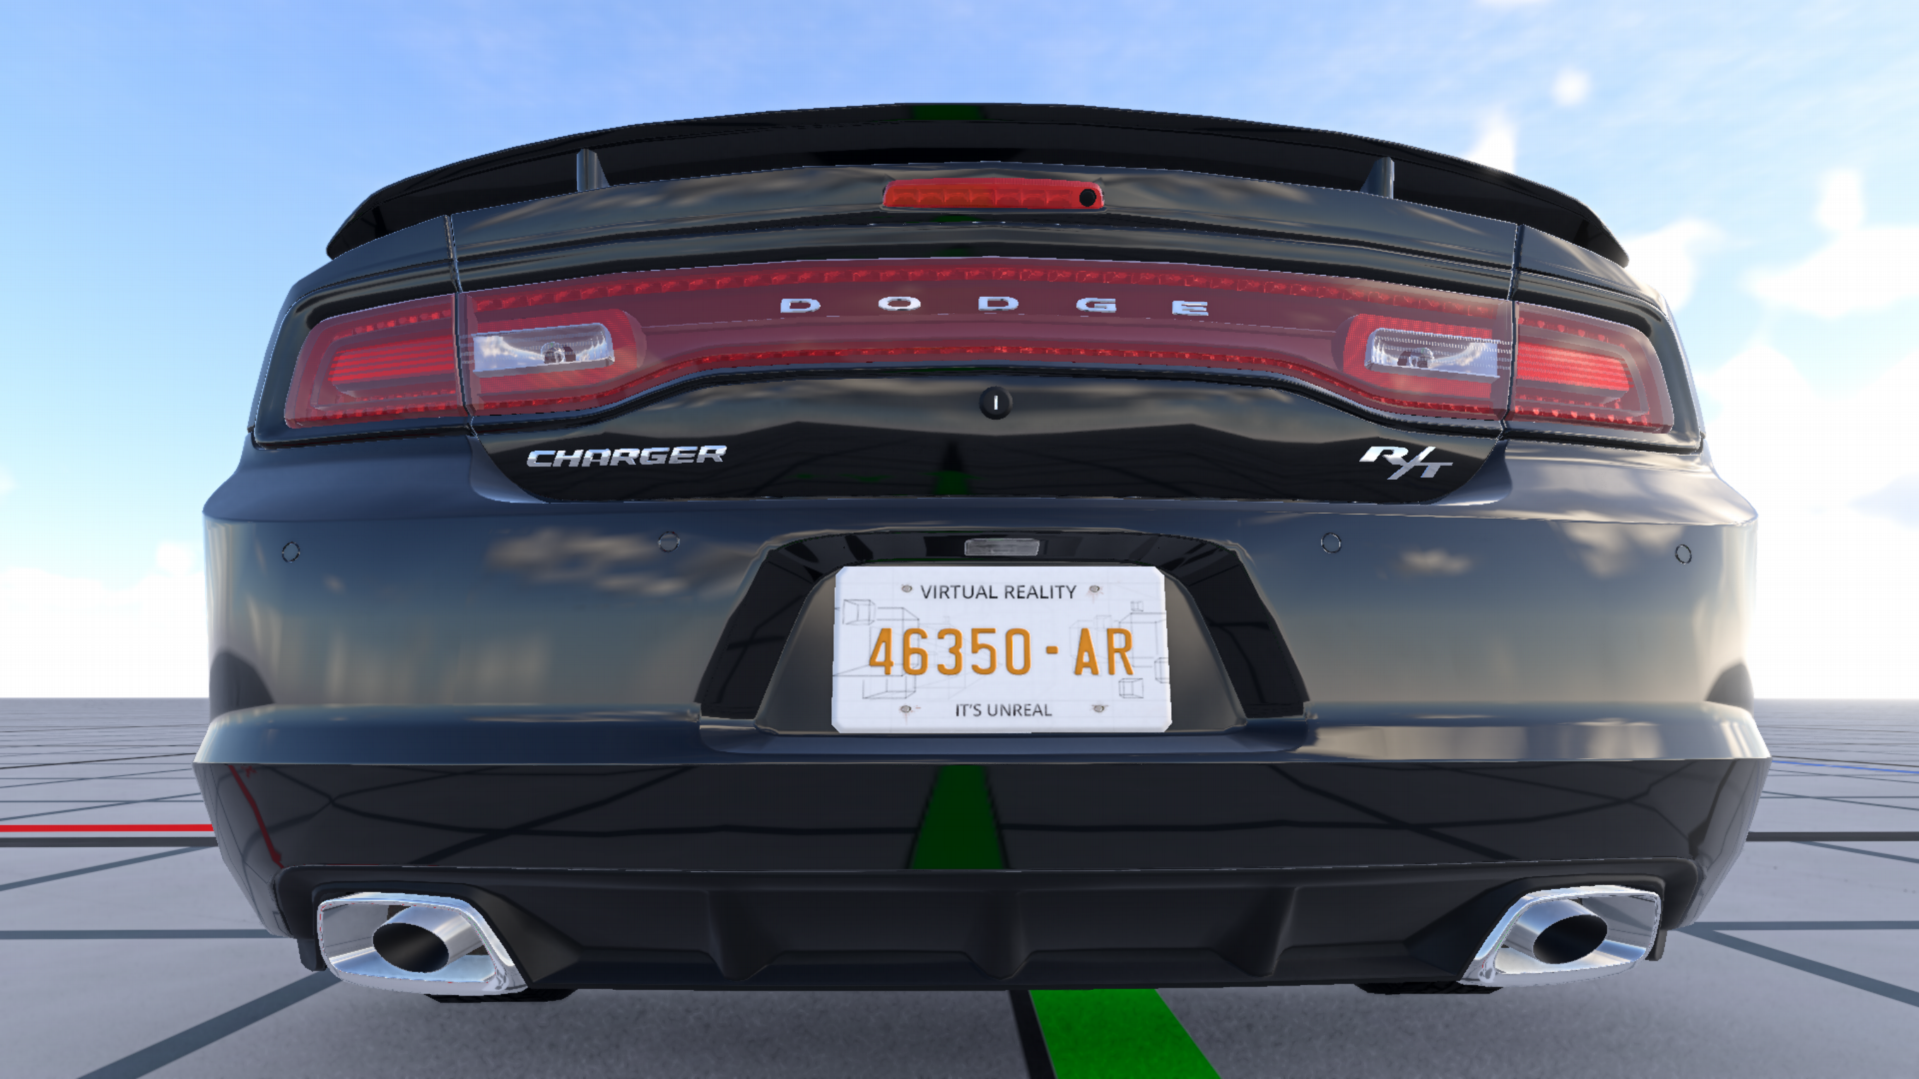
    To close off this week’s report, here’s a photo of Day One of my latest Mystery Project. I won’t say what it is yet, but the answer could be revealed in a future blog post. This is another one of my long-term endeavors that are tied to International Offshore 2027 (or so we believe, for now).

    Well, that’s going to be it for this update. Good luck figuring out what the hell is being represented by the above photo!

  • Wednesday Update: New 3D Modeling Project & Flames of Rebellion Progress

    Wednesday Update: New 3D Modeling Project & Flames of Rebellion Progress

    It’s been a little while since the last update on this site, but then again, I’ve been quite preoccupied with various projects ever since the downfall of the Ashryver Models situation. (That’s right: the Ashryver V1 painting classifier and everything related to it has now been destroyed, and no longer works. This is the result of a full-scale pivot to more reliable, worthwile, and engaging projects). I’m now mainly focusing on the final main book in the Flames of Rebellion Series, and a Blender 3D modeling project for a BeamNG.drive mod.

    In this update, it’s time to take a look at what’s been going on lately. I’ll also provide some rough estimates and plans for the Flames of Rebellion series, and when the next couple of books might be coming out.

    Blender 3D Modeling: the Soluna Project

    My current progress in Blender. I’ve increased the width of the vehicle’s body as it seemed much too narrow before, but at the same time, I may have gone too far.

    This is my latest (and primary) undertaking. I started working on this 3D modeling project about three weeks ago, and it was inspired by the lack of any AL50 Toyota Soluna (1998-2002) mods on the BeamNG.drive community. This is because it’s not a very well-known vehicle; with this project, I intend to fill that gap.

    My first step in this project will obviously be to get a basic 3D model. This is proving to be a very challenging and time-consuming process; however, I have completed the body outline, all four wheel arches, and now starting on shaping the hood after three weeks. My current estimate is that it’ll take another few months to get this model done if I continue working at this pace; December or January of next year is a good estimate.

    After that, I’ll need to move into the nodes & beams phase of the modeling process. This involves using the 3D model as a framework and adding the BeamNG core components around it, including the nodes, which are like the vertices in a complex chemical structure, and the beams, which connect the nodes together. There could easily be thousands of nodes and beams for a fully beamed (or JBEAMED) vehicle, so this might take another 4-5 months.

    The final phase will likely involve doing some UV mapping, sorting out the myriad bugs that I’m sure will emerge, and getting all the configurations set up. And this will likely just be for the basic Soluna copy with the standard interior and openable doors. This particular version of the project will be released on third-party sites like Modland only, since BeamNG prohibits the distribution of copyrighted vehicles on their own site.

    However, I have a workaround for that. Once I’m satisfied with the base Soluna mod, my intention is to go back and creatively modify the vehicle so that it fits with BeamNG’s in-game Ibishu brand. This should work well, since Ibishu is BeamNG’s equivalent of Toyota; from there, I can subtly change the taillight design and the gauge cluster, for example, so that I can market a lore-friendly Soluna version on the BeamNG repository. (This whole mod will obviously be free, of course. I don’t believe in charging money for mods of any kind, no matter how many apps are supported by the game’s ‘CarPlay’ screen, or how many ‘hours per day’ I spend on the mod).

    Right now, all of this is sounding rather daunting as I’m only on the 3D modeling stage. Honestly, though, I’ve made a whole lot more progress than I’ve expected in the psat few weeks–and certainly since the first blog post I wrote about this modeling project, when the Soluna was still a shapeless box. I’ve encountered numerous troubles along the way, most notably with the wheel arches. For some reason the geometry got destroyed as I was trying to fill in points surrounding the rear arch; the fan got all tangled up and cluttered. I had to completely reset the rear arch and start over; fortunately, that fixed the problem after a couple days’ of work. I can only hope that I’ll be able to push through similar challenges as this gets more complex, becuase I know these issues will be coming.

    Below is another view of the current state of the Soluna project; I’ve just diagnosed an issue with the main soluna_body being far too narrow. Hopefully I haven’t inadvertently broken anything else.

    Flames of Rebellion Book 4

    As you may recall, the previous book in the Flames of Rebellion series (book 3.5) was published just back in April. That was Reckoning of the Past, a medium-length in-between novel detailing a side plot in the series. Now, I’m moving hard on Book 4 in the Flames of Rebellion series, currently called The Conquest of Peace. This will likely be a longer book, in the 410-420 page range, as this is the series finale and needs to tie up all the loose plot ends. Right now, I’m sitting at about 30,000 words and 135 pages, putting me at about 35% through the book. I can’t release a target month right now, as it’s still a bit too early for that, but I’m hoping it can be published around winter 2026 (December 2026 to maybe January 2027).

    After that, only one book will be left: the prequel. This will be book 0.5, examining what came before the First World and the Thirteen Worlds and everything taking place in the main series. Book 0.5 will be set in around GY 23, which is the World Zero equivalent of about seven hundred years prior to the main novels. It will focus on the ancient Cymantian Empire, explaining the political conflicts and conquests that split apart the empire and led to the turbulent formation of the First World. While Jonathan, Lily, Phoenix, Ember, and Grace will not be a part of the prequel (at least, not right now), there will be many other new and intriguing characters, plus old villains like Aaron Fisker and the Cymantus itself. I’m still figuring out the best way to introduce this ancient world without making readers feel too confused.

    My current end-of-series target is summer 2027, or about a year from now. If possible, I’d like to get the Flames of Rebellion universe closed out before the next International-Offshore Excursion, which is still tentatively set for summer 2027 as well. This will provide clean break for the next project, which might be something completely different, and much more grounded in reality. Stay tuned for that.


    Well, with that, I think that’s everything for this site update. I’ll be updating the Flames of Rebellion page soon with some more details about Book 4, and expect more updates as the Blender 3D modeling project progresses. Hopefully I won’t destroy any more geometry!

  • New BeamNG Modding Project: Toyota Soluna AL50/Ibishu SLN-10

    New BeamNG Modding Project: Toyota Soluna AL50/Ibishu SLN-10

    Having gotten tired of broken AI models, destroyed repositories, lagging GitHub environments, and broken fast.ai courses, I pivoted to an entirely new project this week: BeamNG modding. The vehicle mod I’m intending to build is based on the 1998-2002 Toyota Soluna AL50; the first step is to create an exact replica of that mod for third-party free distribution. Then, a more refined lore-friendly Ibishu version will be released.

    For quite a long time, I’ve been intending to get into the BeamNG vehicle modding universe. However, the issue has been the 3D modeling segment of the project, which is where I’ve always gotten stuck. Up until this week, the most I’d been able to achieve was getting the reference images positioned into the environment with none of the actual vehicle whatsoever; now, though, it seems I’ve made some progress. Read on for some details on my current undertakings, some screenshots, and plans for what I’m going to do next.

    The Project

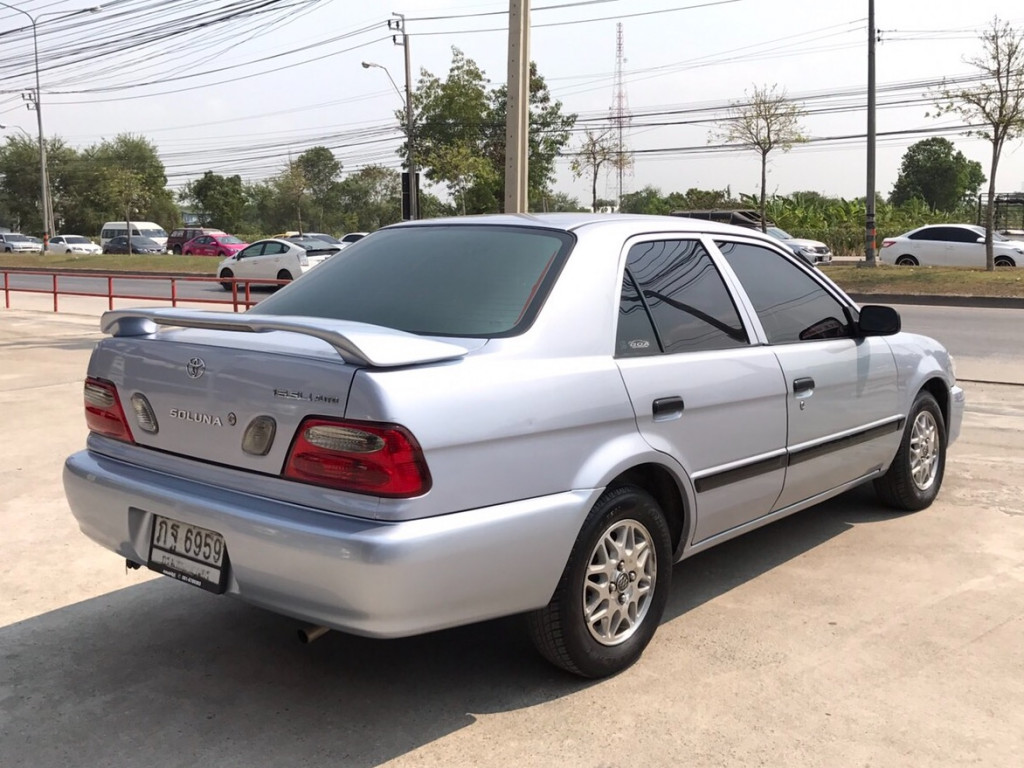
    This is the vehicle I’m trying to model right now. Read more on Wikipedia for a brief overview.

    Not wanting to spend ten months designing an elaborate electronic gauge cluster and setting up emergency braking with automatic headlights and drink dispensers, I decided to choose a relatively basic, bare-bones vehicle to model. I ended up going with the Asia-exclusive Toyota Soluna, which is only sold in a right-hand drive configuration. It’s slightly smaller than the early-2000s Toyota Corolla, and has much less in the way of features. However, it’s a functional, reliable vehicle, and seems to be pretty easy to model.

    I’ve started off by obtaining reference photos of various angles of the vehicle, including a side view, front view, and rear view. I’ve then placed these inside the Blender environment so I can better structure the blocking boxes (which will be discussed in the next section). The plan is to only offer the vehicle in an RHD configuration when distributing it through Modland; after all, this initial stage of replicating the exact vehicle is partly for my benefit and for the enjoyment of actually experiencing an in-game Toyota Soluna. (There is currently NO Soluna mod widely available for BeamNG – not even close).

    After that’s done, I intend to go back and refine the mod for distribution on the internal, strict BeamNG Repository. Here, you are prohibited from uploading mods of real life vehicles, so I’ll need to modify the vehicle so it fits in with the fictional in-game car company Ibishu. This actually works perfectly, since Ibishu has always been represented as BeamNG’s version of Toyota. The Soluna’s lines fit well with Ibishu vehicles in that era (Covet, Pessima Mk1, etc.) and should be a good lore-friendly project.

    The Process

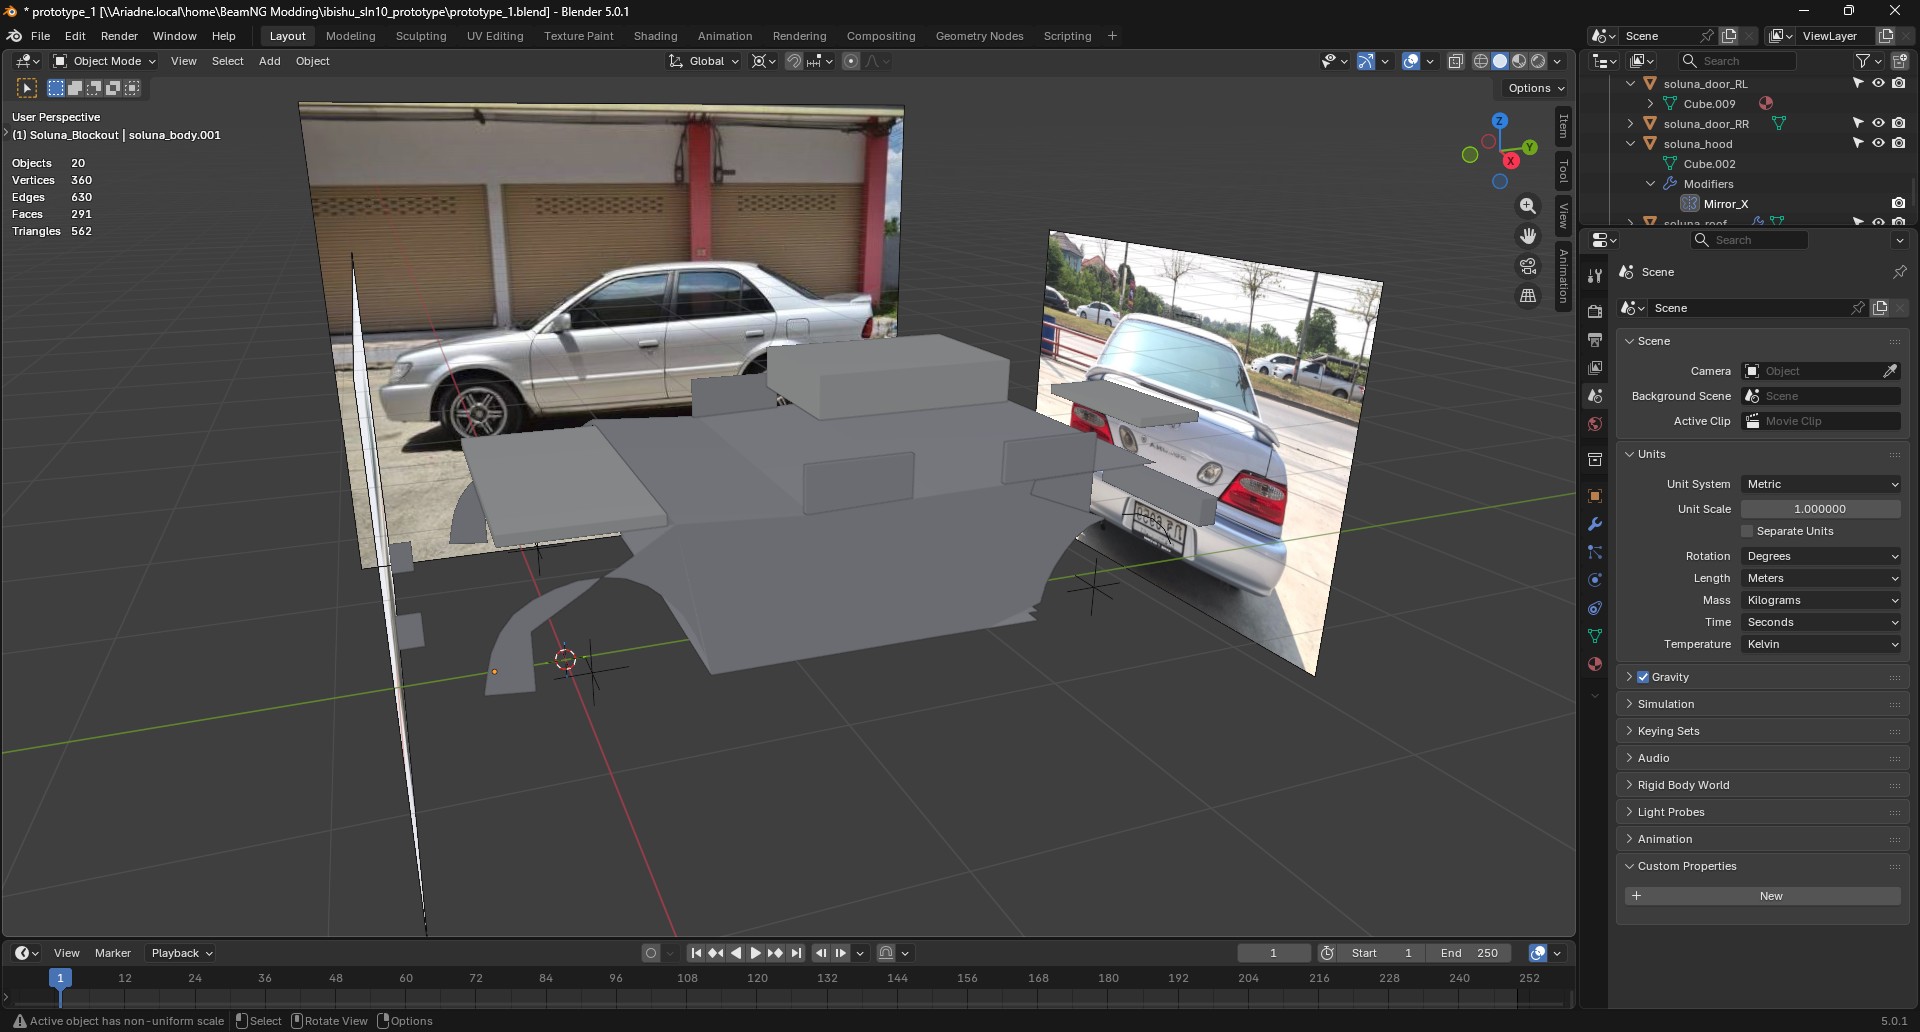
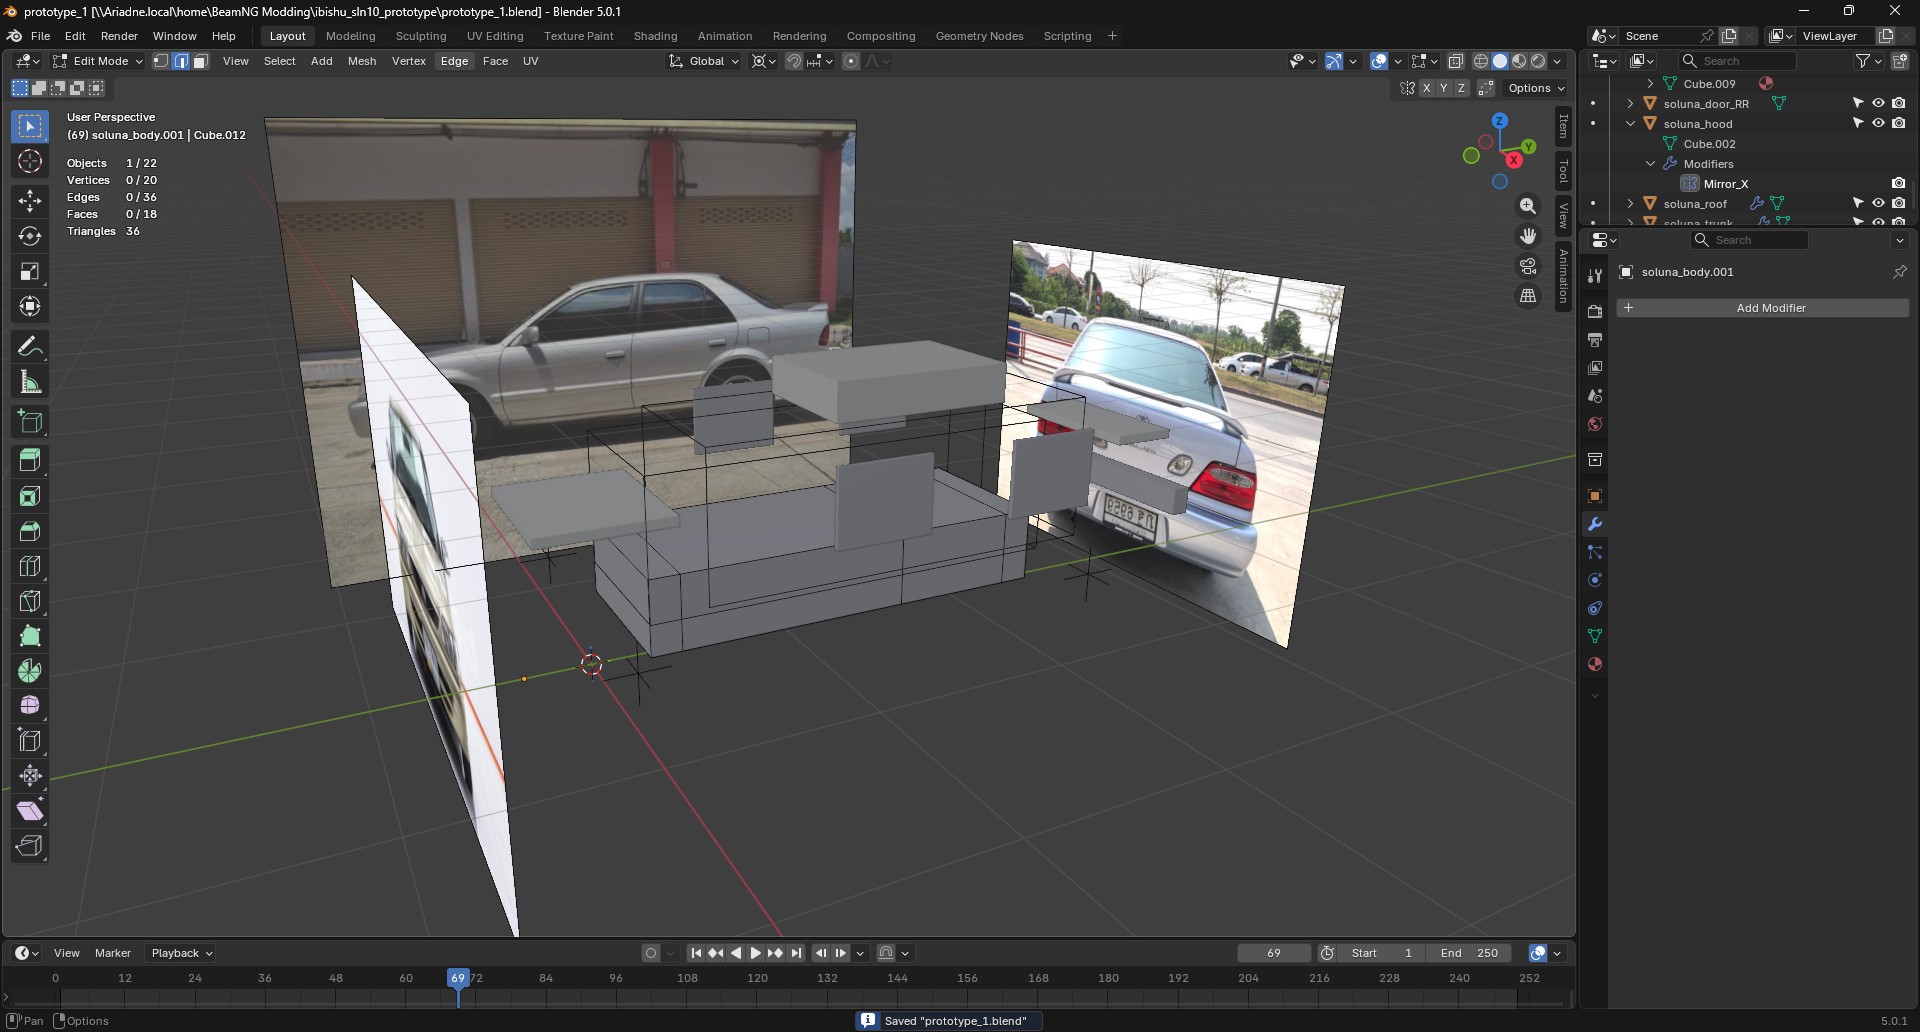
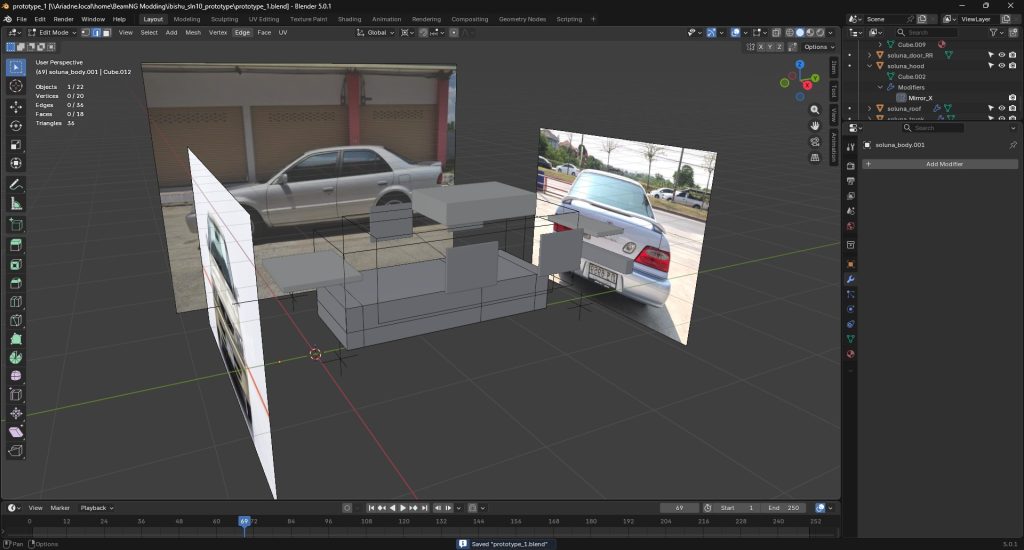
    As of right now (Friday, July 17, 2026), I currently have a complete blockout of the Soluna, and I’ve added some loop cuts to signify some basic panel divisions. A “blockout” essentially represents the skeleton of the vehicle; you have the full envelope, the roof, all four doors, the trunk lid, and the hood. This makes for a total of ten boxes, including the front and rear bumpers as well, which you might be able to see in the above image. This blockout will provide me with a starting point for pulling vertices and shaping the curvature of the vehicle; that’s the next step I’ll be moving onto shortly.

    To start off with this mod, I’ve decided to make use of Blender Python, or .bpy scripts, to generate some of the geometry. Doing some of that stuff by hand would be very tedious, so I have used scripts to add mirror modifiers (so that changes I make on the driver’s side will be mirrored to the passenger side, for example) and find the exact specifications of the vehicle. This measurement-finding has actually been the most time-consuming part of the process so far: I’ve had to line up all the boxes exactly to the reference images, making sure the front overhang is the correct length and checking all values in the script against official measurements.

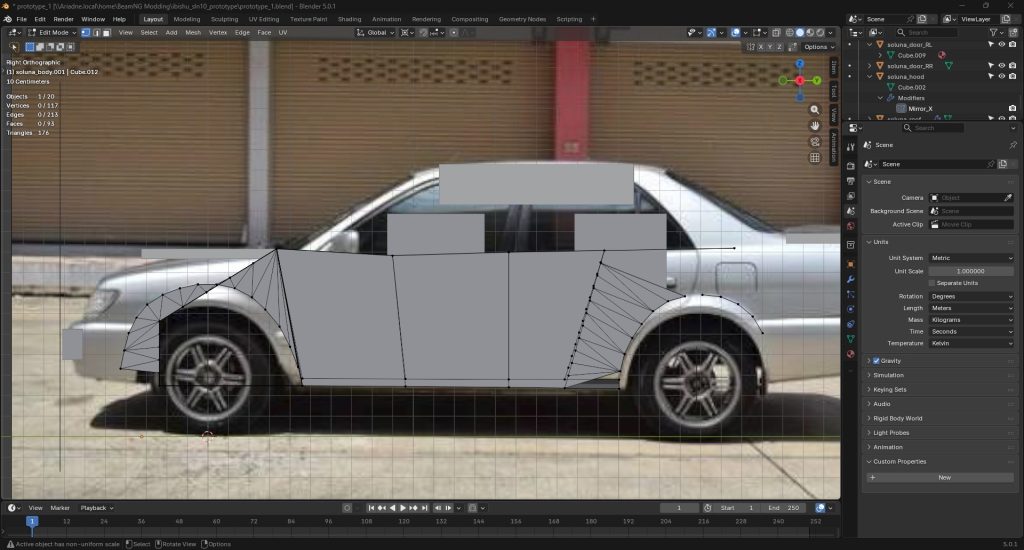
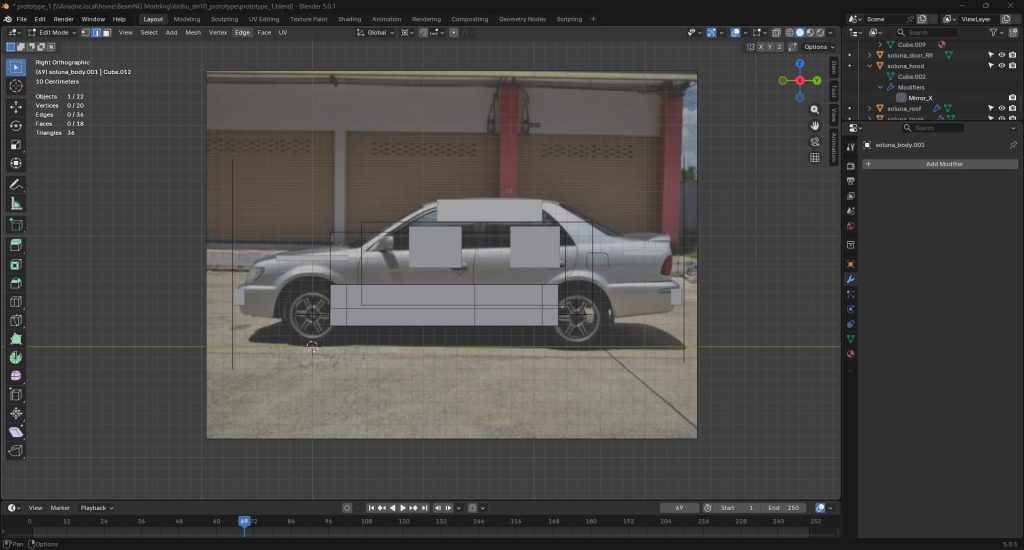
    Hopefully I haven’t made any serious mistakes in aligning the vehicle against the images, but from what I can tell, everything seems to be working out. In the image above, I’m looking at the environment in the 3D perspective; if you were to switch to right orthographic or front orthographic view, you’d see the vehicle lined up closely to the reference image. An example of the side perspective is shown below:

    The right orthographic view of the blocking boxes. You can see the three loop cuts I’ve added on the soluna_body box, which represent the front fender arch, the B-pillar (midpoint of the two doors), and the rear-fender arch. There’s also a loop cut on the hood box representing the windshield-to-hood divider, but that’s not visible as the hood box is not currently selected.

    I spent the most time yesterday on getting those insane loop cuts to actually go in. At first, I was just spamming Ctrl+R, clicking helplessly, and nothing was happening. Then, after some searching and usage of AI agents, I discovered the proper sequence of clicks and presses to make those loop cuts appear. I had to re-generate the entire blockout in the process, though, because somewhere along the way the environment had gotten muddled and unable to process any new loop cuts. Now that I have four cuts, though, I’m going to start extruding and pulling vertices to shape the vehicle, which might involve some more frustration and Blender Python scripts.

    Next Steps

    Here it is: the trademark “Next Steps” section that I always manage to include in these project update posts. Well, when it comes to this Toyota Soluna mod, the primary next step is going to be to continue working on shaping out the vehicle and creating a real structure. Right now, I just have some vague boxes for where the various panels and portions are; over the next few weeks I’d like to refine the shape of the vehicle and maybe have a hood/trunk curvature laid out. This is probably the most time-consuming portion of the modding process, although the whole JBEAMING situation might be difficult as well.

    With the fabled BeamNG v0.39 update in a confused state, I’m not sure how it’s going to affect this process. It could be released this Sunday, or this September–or even next year. When it does come out, though, I really hope the devs won’t break the jbeaming interface or drastically change anything related to the modding process, because it means I’ll have to relearn everything to do with Lua and possibly contend with out-of-date and broken models. If that happens, it’s time to return to the Ashryver models!

    Stay tuned for further updates. Time to continue working on the modeling.

  • Ashryver V1 Painting Classifier: Release Summary

    Ashryver V1 Painting Classifier: Release Summary

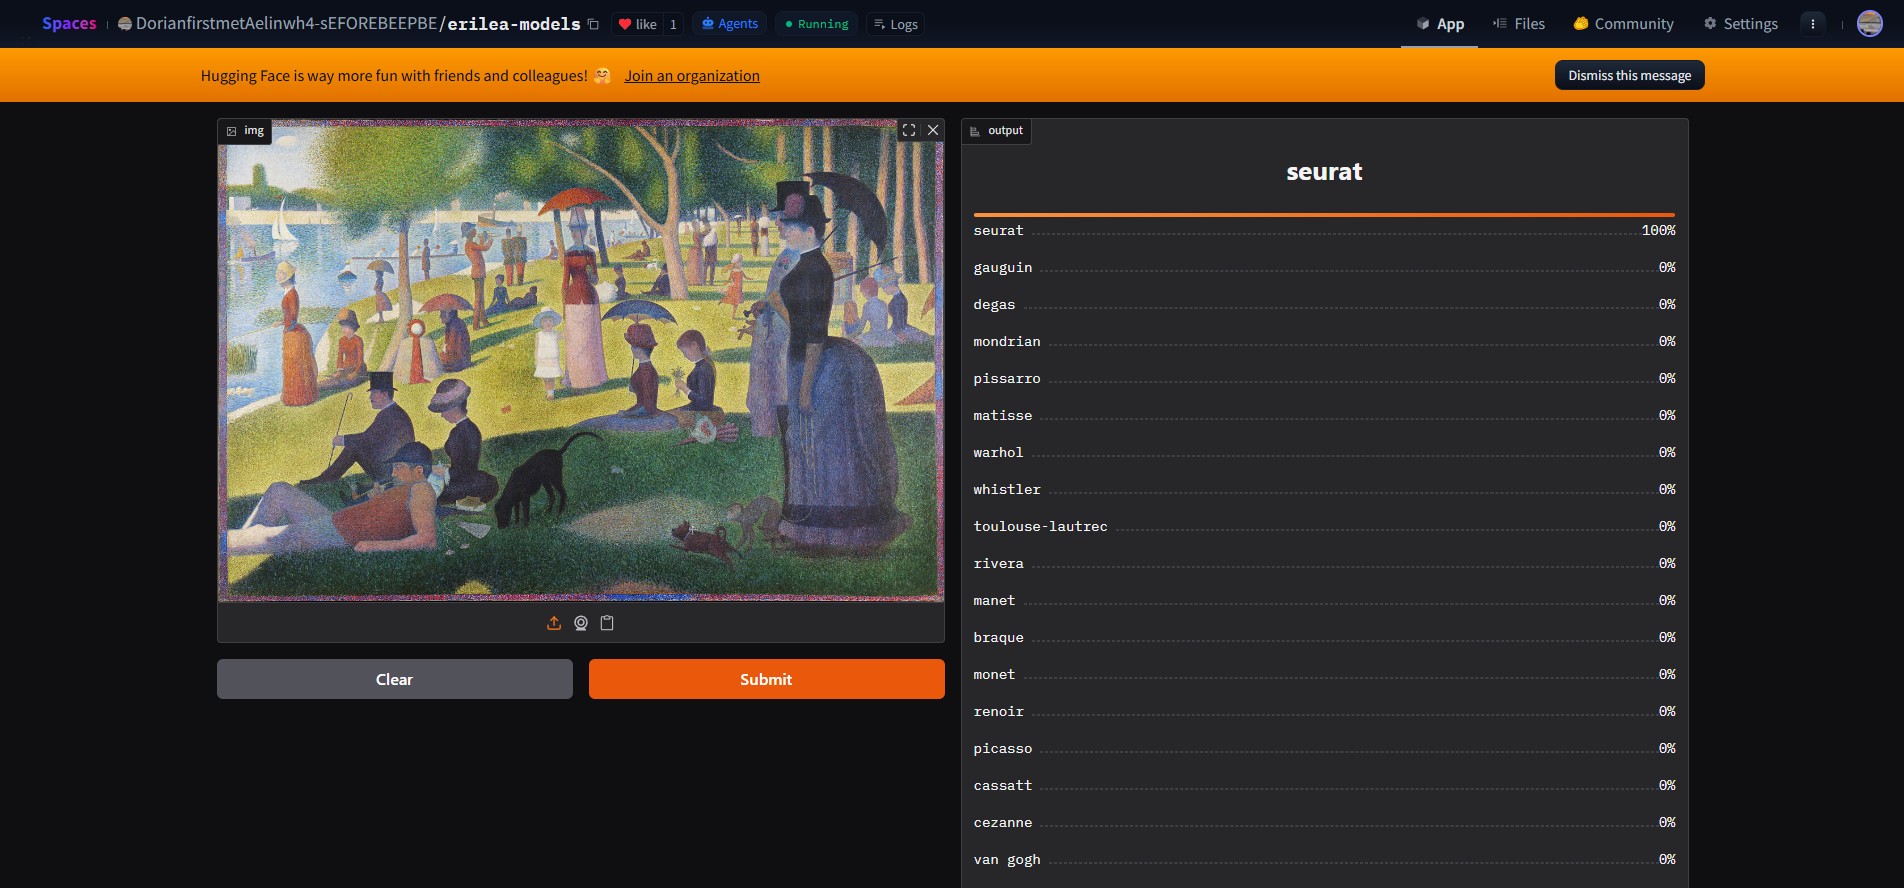
    Today, I finally finished setting up the Ashryver V1 Painting Classifier, my latest interactive web-based model, and placed a live embed on the AI, ML, and Web Projects page. You can now interact with the model right from your browser, and upload any painting you choose for the model to make predictions. Although the embed is a little small, and the formatting is still on the uneven side due to WordPress’s lack of flexibility, I hope to have these issues sorted out soon. Besides, my ultimate plan (perhaps once the final, non-prototype Ashryver V2 model comes out) is to place an active HuggingFace API instance of the model on one of my websites. I’ll have to wait until HuggingFace and Gradio sort out a CORS issue first, though, as there have been known issues across all platforms for the past few weeks.

    In this post, I’ll provide a brief summary of the training process, the overall model performance, and my future goals now that this project is “finished”.

    The Training Process

    I started working on the Ashryver V1 model about a week ago. I used the fast.ai foundational framework for this project, moving away from the clunky and cumbersome Tensorflow libraries I had been familiar with before. fast.ai is just an upper layer of Pytorch, which is the latest and most efficient machine learning library. I was blown away by how easy it is to instantly create and train a deep learning model; all it takes is just a few different code cells and some DataBlocks.

    As a brief reminder, this Ashryver V1 model is a painting classifier trained on images of 20 different Impressionistic and modern artists; I aimed for about 300-400 images per artist, yielding a total dataset of about 2,700 images (about 500 of which were split off for validation). Although this is a relatively modest dataset size, it ended up doing the job very well. I did have to go through several training runs to get the accuracy above its initial poor score of 0.60, but things turned out well in the end.

    At first I was using the resnet34 model, which was rumored to be exceptionally good at classifying paintings. This is one of PyTorch’s pretrained models, and it’s called resnet34 because it has 34 layers in its convolutional neural network. This worked out okay, but generally you want to be achieving higher than 0.60 validation accuracy for a classification model. So I decided to switch to the resnet50 model, which prefers an image size of 224 x 224 pixels and has 50 layers in its CNN. This model performed substantially better, first achieving an accuracy of 0.77 on the initial 1800-image dataset, and then 0.89 on the final 2700-image dataset.

    Once you have your data in the artist folders, this is all you need to do to train your model -- just two simple code cells.
    
    # Create the Datablock
    dls = DataBlock(
        blocks=(ImageBlock, CategoryBlock), 
        get_items=get_image_files, 
        splitter=RandomSplitter(valid_pct=0.2, seed=42), # split 20% of the data off for validation
        get_y=parent_label,
        item_tfms=[Resize(448, method='squish')]
    ).dataloaders(painting_data_updated, bs=32)
    
    dls.show_batch(max_n=20) # show a sample of 20 images that the model will be trained upon
    
    # Train the resnet50 model
    learn = vision_learner(dls, resnet50, metrics=error_rate)
    learn.fine_tune(4) # train for 4 epochs
    

    The Production Process

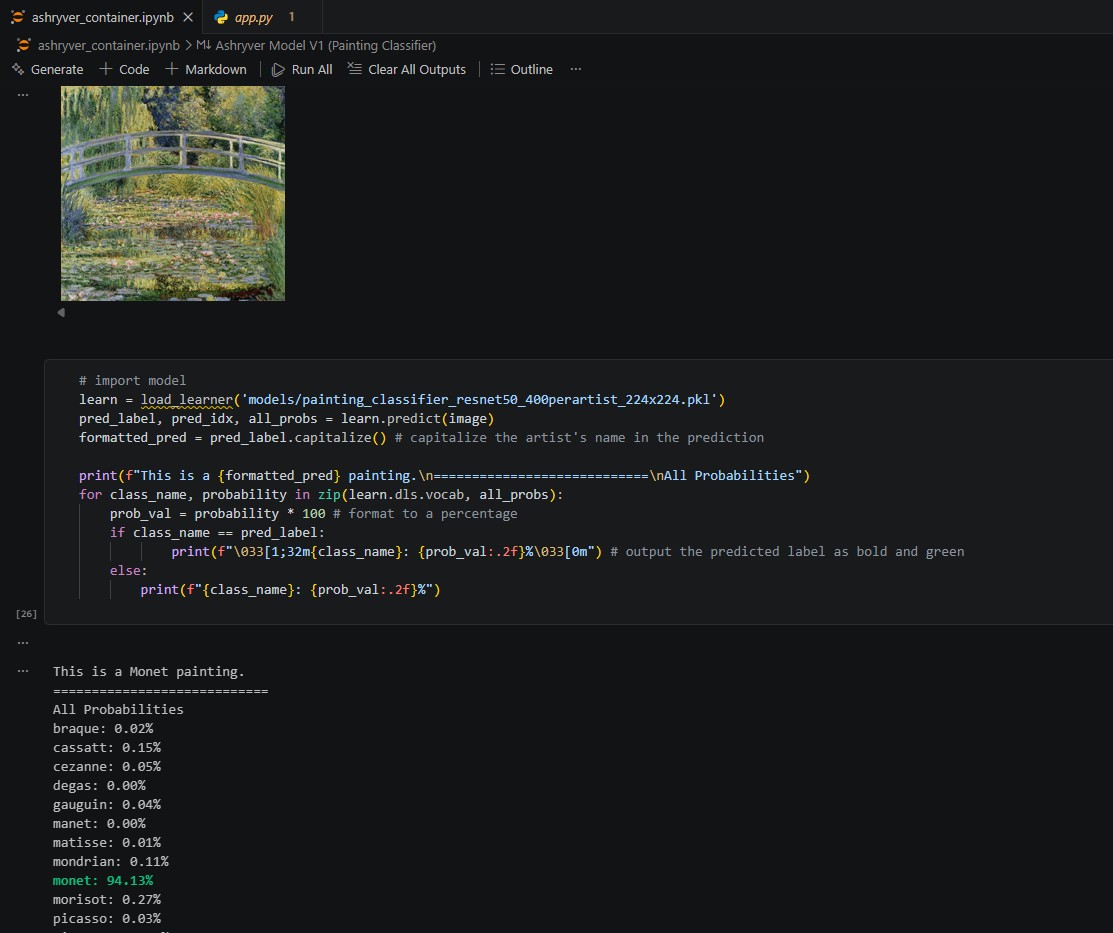
    Once I finished training the model and was satisfied with the result, I moved onto the production process. In the previous blog post, I touched on the difficulties I was having with HuggingFace in setting up a space for the model; I managed to resolve these issues a few days ago and get moving. The Ashryver V1 model (and any successive models) are running in a HuggingFace space, which I’ve set up and named ‘erilea-models’ to embody the fictional continent of Erilea. This space behaves somewhat like a GitHub repository, which you can clone down to your computer to add code and add models that can be represented using HuggingFace’s UI. All I had to do with this repository was drop in my pre-trained model in the form of a PKL file, and then call that file to make predictions using a simple notebook. That notebook then launched a Gradio interface (essentially what creates the graphical UI you see on the space itself) that allowed the model to make live predictions.

    This way, you don’t have to clone down the entire repository and install a bunch of insane packages to play around with the model. You can just go to the HuggingFace space (which I’ve made public), upload your own images, and have it make predictions. There’s actually even more I could do with this model, like using the Gradio API to place it on one of my own websites and use some custom JavaScript to make it look a bit different. However, the current HuggingFace solution works perfectly fine for this V1 model; I may consider switching to a more advanced API solution for V2.

    Next Steps

    Speaking of V2, let’s take a final look at my next steps for the Ashryver model. I’d like to improve the model’s reliability on Matisse paintings; right now it continually misclassifies Matisse’s tape drawing The Bees. I’m not sure how to deal with this one, as it isn’t a “painting” in the traditional sense, but users might still want to predict with that image. There have also been some isolated issues with other artists, where incorrect predictions crop up every so often.

    For V2, my plan is to find some way to deal with the ridiculous watermarked images or those that contain overlaid text in the training process, as these really seem to be sabotaging the model. I also would like to add a bit more data if possible, maybe for certain artists only, so the model can get a more comprehensive view of what’s going on. I may also add some additional artist categories (although this is optional), and I would definitely like to add a “sister” model that is designed to recognize the artistic era or period of a painting, and use that model to make “backup predictions” of a painting’s era in addition to the artist, in case you give the model a painting that it’s not familiar with. These enhancements should make the Ashryver model much smarter overall as a painting classifier; once I get these improvements done, I should be ready to move onto Unit 3 of the fast.ai Practical Deep Learning course.

    Don’t forget to check out the model on HuggingFace, or go to the AI, ML & Web Projects page to play around with the widget. Stay tuned for more updates!

  • Deep Learning Debacle: Deploying the Ashryver V1 Model (Painting Classifier)

    Deep Learning Debacle: Deploying the Ashryver V1 Model (Painting Classifier)

    Today (and this entire week) has been quite the adventure when it comes to deep learning AI models. I finally got off the ground on my latest project, the Ashryver model (the easy-to-remember codename for the 20-artist painting classifier). After building it locally with Jupyter Notebooks and Kaggle, I advanced to the next unit in the fast.ai Practical Deep Learning course, and started attempting to deploy it on a HuggingFace/Gradio space…

    …and promptly entered into a world of calamity.

    Creating an account on HuggingFace and setting up a space was pretty easy. But that was just the tip of the iceberg, as you might imagine. After that I had to figure out a way to set up an API key, clone HuggingFace’s Github-adjacent-but-not-really-Github repository down to my computer, add my pickle files for the Ashryver model, and deal with all the humongous files and conflicts. This quickly spiraled into hell. First of all, the API keys kept getting “into a stuck state” when attempting to commit changes to HuggingFace; apparently HuggingFace had deprecated a core feature that allowed users to authenticate with their HuggingFace password back in 2023, and you now had to use your cryptic API key. So I was forced to generate the in-universe “aelin” API key and use that, which fortunately worked.

    However, that wasn’t the end of the troubles. I then encountered issues committing any changes at all to HuggingFace, due to binary file limitations and Git LFS complications. At this point I was engaging in a lengthy back-and-forth conversation with Google Gemini, trying to figure out the best course of action for what I was facing. Every time I tried to turn on LFS or add the files, pushing any staged files would just lead to more and more errors. Eventually I just gave up and followed two core pieces of ML management advice: never upload your .PKL files or dataset files to source control because they can be a target for malware and bloat your repo. For now, I’m just leaving them untracked on my laptop, and not committing them to HuggingFace. After all, the model will be able to run live; users shouldn’t need to poke around in the source code this time.

    Speaking of poking around in the source code and my future plans for the Ashryver architecture, let’s dig into those topics now…

    Future Plans, Links, and Naming Conventions

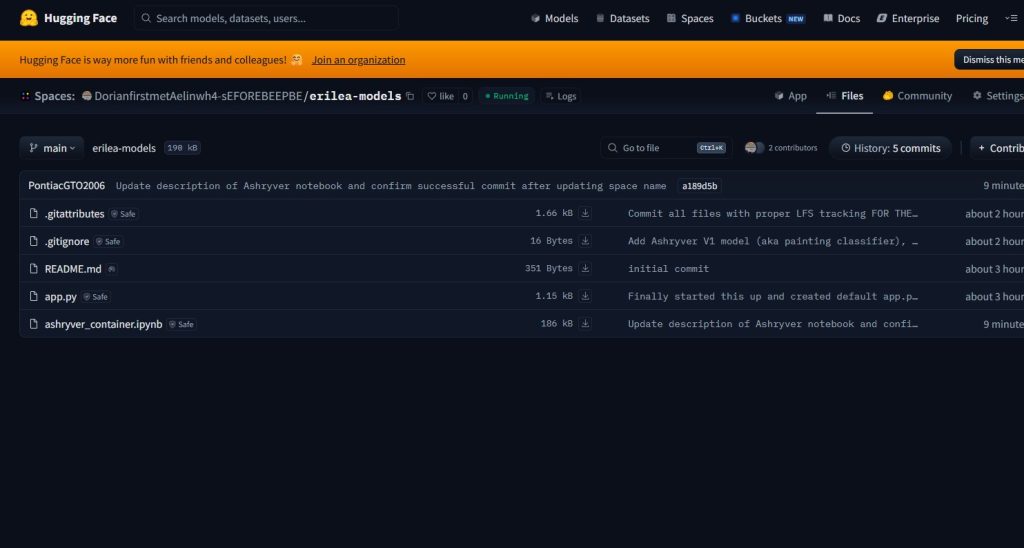
    The current state of the HuggingFace space, displaying all model files

    Click to view the current HuggingFace space, which is still very work-in-progress.

    You may have noticed the rather unconventional name of the space itself, erilea-models, and the interesting name for the painting-classifier model architecture, Ashryver. If you’ve really been poking around in the Files section of the HuggingFace space, you may have noticed references to an “Aelin” or “Sam Cortland”. If you’re really receptive, you may have made the proper neural network connections and surmised that these are characters from a fictional series.

    If so, congratulations. To make things more interesting, and detract from the tradition of naming repositories and models boring things “like Testing Area 1 and Deep Learning Architecture System Version 1”, I decided to spice things up and give this space and its models some creative names. These are not so much “original” as “easy-to-remember”, which makes it more convenient to key in GitHub commands when all your filenames and model names are simple names. I plan on naming each successive model I release after a different character, improving upon each one with clear version numbers.

    As for my plans at the moment, I intend to continue working on getting the Ashryver V1 model into production. When that’s done, you’ll be able to go directly to that HuggingFace space (linked above), upload your own paintings, and have the model instantly make predictions. Right now, although the model has consistently been getting 0.89 accuracy on test runs, it still makes the occasional error when it comes to Henri Matisse’s paintings and tape drawings. This is an issue I plan to correct in Ashryver V2, which is where I might also introduce more artist categories. For now, though, all my time is probably going to be spent on getting Ashryver V1 into production.

    What all this means is that users will no longer have to clone cumbersome GitHub repositories and figure out ways to get my code to work on their very different machine, which sounds like a recipe for disaster. I’m planning on uploading my past models into that same HuggingFace space as well, or maybe a different one to improve organization. I’ll at least put the CIFAR Image Classifier on there, and maybe even the QuickDraw model if I can get it to work. After that, I intend to work on some more computer vision models, deep learning projects, and put something even more substantive than Ashryver out on the web.

    I’ll probably put up links to my various HuggingFace spaces eventually on this website, and they will serve as the “showcase sites” or portfolio pieces for the various AI models. This is what I’ve been working up to for quite a while, and it’s good that I’ve finally started working on a way to get these models into production.

    Well, that’s all for now on the deep learning front. Stay tuned for more calamitous updates!

  • Site Update: New Creative Works, Comments, and Inspirations

    I made some major changes to this website’s content and aesthetics this week, which you may or may not have noticed. First, I modified some of the fonts that are used, and installed a new minimalistic font that I felt went a bit better with the site’s theme. That font is now used on some of the page headings and titles across the website. Second, I completely revamped the Short Stories & Poetry page to better showcase my various poems and stories in a grid layout. Each piece has its own Inspirations & Comments section, where I attempt to convey what led me to compose the piece, and the meaning behind it.

    I’m still working on adding more of my poetry and short stories, but I have a semi-comprehensive list on the Short Stories & Poetry home page. In fact, I’m working on a rather unusual coming-of-age short story right now; it might be the submission for the 2027 Scholastic Art & Writing awards. Once that’s done, I’ll attempt to upload it to the website, and attach some comments. I’m contemplating adding a background-header sort of picture to the short stories & poetry page, similar to the large one on the homepage. However, I’d like the text to be overlaid upon the background image, and thus far, I haven’t found a way to do that with clunky WordPress.

    I’ve also made some minor tweaks to the Musical Works page, changing the names of some tabs and linking some of the most recent compositions. As a quick note, it is now possible for people to fill out the site’s Contact form to obtain copies of the scores; there is a one-page preview image available for some of the more recent pieces and a button to get to the Contact form. I don’t plan on charging money for the scores; this is just a mechanism to prevent bots (or people) from coming on and scamming the scores to a wide variety of unauthorized individuals.

    Deep Learning Course: Finally, Some Progress

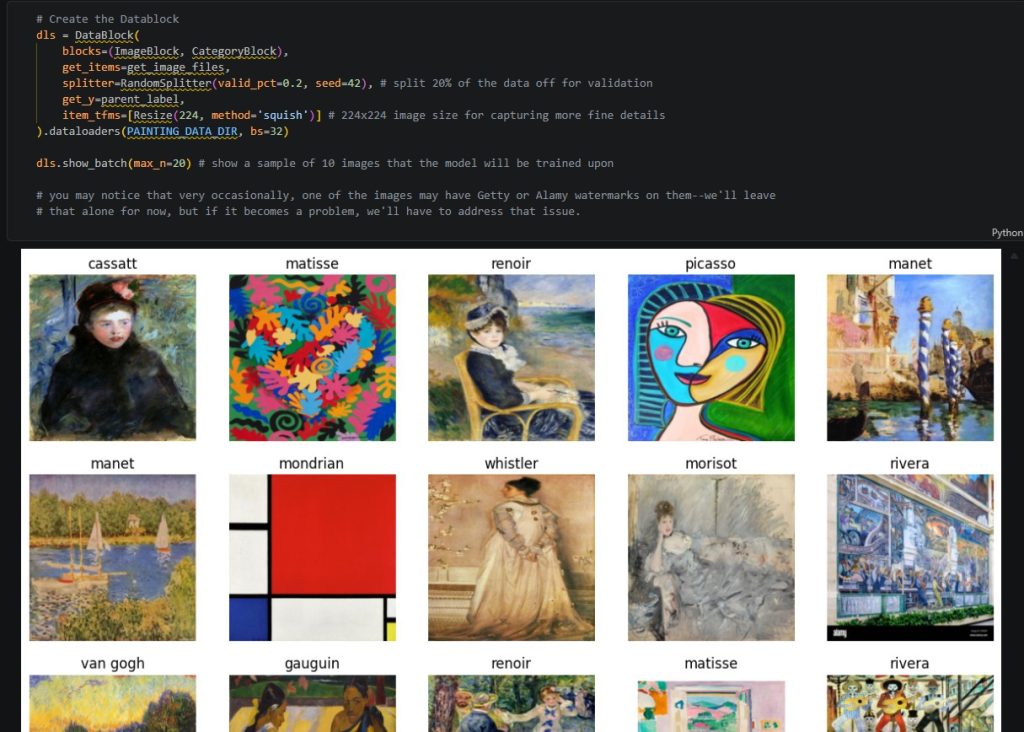
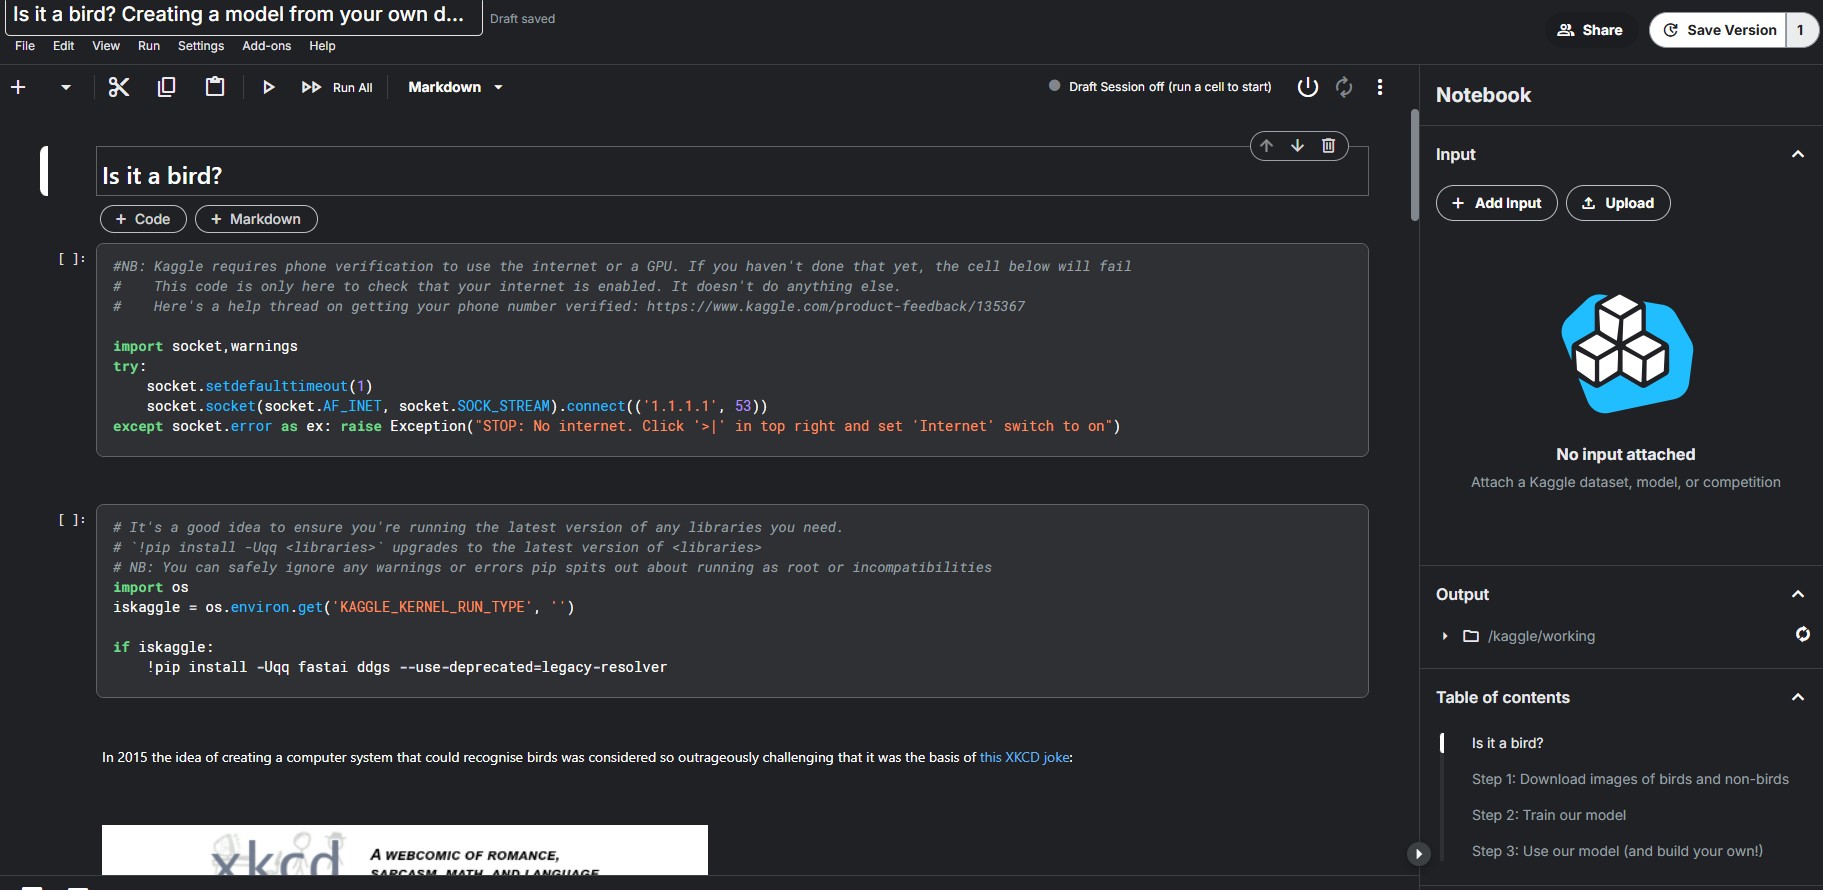
    A code cell and output from the fast.ai painting classifier, displaying some sample photos that will be used to train the model.

    After about a week of screaming and coming close to quitting the entire course, I finally started making some progress on the fast.ai Practical Deep Learning for Coders course. Yesterday, I finished training the first major project, which is a painting classifier designed to identify the artist of a given painting image. Right now, I’m training it on the works of twenty different Impressionistic artists, with some more modern painters also included. I’m amazed at how much easier it is to use PyTorch to create a classifier than Tensorflow; all you need to do is pull down your images, create a DataBlock, and initiate your learner.

    The reason why I was getting so blocked on this model before was the stupid DuckDuckGo search issues, combined with issues with Kaggle. This sort of classifier relies on pulling down batch images from the DuckDuckGo search API, which is flaky at best and catastrophically time-consuming at worst. So why am I using DuckDuckGo, of all search APIs? Because Microsoft has gone bad and locked their Bing Search API behind a paywall. In a similar way, Google’s search system requires several different API keys, extensive verification, and massive amounts of credentials that make no sense for a small project like this one.

    At first, I thought I was going to have to quit out of this project and find a different data setup that didn’t rely on DuckDuckGo. But then, on Monday morning, I “magically” stopped getting 403 Ratelimit errors, and started downloading images as normal. So I jumped on the opportunity and immediately trained the model to completion with all 4,000 images; after doing some brief testing, it looked like the model was actually pretty good. I’m going to obtain some empirical data on the model’s performance–accuracy, loss, and others–shortly, and use that data to experiment with some different model architectures and data configurations.

    I also did some minor refactoring of the model’s code, which is now available in my official fast.ai course repository on GitHub (though I don’t recommend doing anything with it yet, as it’s still very preliminary, and the repo is still a mess). In unit 2 of the fast.ai deep learning course, I aim to release this painting classifier via a web API so you can interact with it directly; when that’s done I won’t have to deal with muddled GitHub repositories, local files, and broken Kaggle runtimes because the model is released into production already.

    Well, that concludes this regular site update. Stay tuned for further news on AI projects and creative pieces!

  • Update: New ML Courses and Deep Learning Exploration

    Update: New ML Courses and Deep Learning Exploration

    Subscribe to continue reading

    Subscribe to get access to the rest of this post and other subscriber-only content.

  • Reflection: 2026 Chamber Music Perspectives Workshop

    It’s been quite a busy past couple of weeks. The 2026 Chamber Music Perspectives composition workshop mentioned in the previous blog post has now ended, so it’s time to dig into a brief reflection on what happened and the interesting skills I learned during this camp. This will be a “bite-sized” reflection, an interesting technique to explore that forces you to compress your thoughts into a succinct 200-300 words.

    Collaborating and cueing other musicians

    This is probably one of the most important and valuable skills I took away from this workshop. When performing a piece, whether in rehearsal or otherwise, you must take care to Breathe Together in order to inform the other musicians where you are, and when you’ll be starting. If you don’t breathe together, you’ll end up starting off or getting off later in the piece. Another important part of this skill is maintaining a good balance- you don’t want too much of one instrument to soak through and disrupt the careful balance of the ensemble.

    The conductor will usually stop the situation and flag players that are disrupting this sound, but it’s important to recognize imbalances on your own so you can correct them by adjusting the playing.

    Know what the instruments can and cannot do

    This is more of a composition-related skill. When composing a piece for unfamiliar instruments (whether that’s a cello or a ranat ek), you have to be aware of the limits of the instrument, including the range, the intervals, the restrictions on playing techniques, and so on.

    Some instruments can’t play chords with four or five notes all at once without stranging the note or turning it into an appogiatura. I attempted to compose a piece containing several strange intervals that were not only difficult to play, but were very un-violinistic and un-cellinistic. I then had to go back and update this intervals, with the specific techniques and abilities of the violin and cello in mind, and use fourth and sixth intervals instead that are more commonly used. Other individuals who attempted to compose for unfamiliar instruments composed pieces that were on the more boring or uninteresting side, primarily because they were unable to leverage the specific powers of thsoe instruments.

    Improvisation isn’t just about making random screams in the ensemble

    When we started the Improv game near the beginning of the workshop, not knowing what the rules were and how to execuate a fully improvsed piece, we just thought it was about making random noises without any specific rules. However, it turned out that this wasn’t the case at all. Improvisation is actually about listening to what’s going on around you in the ensemble, and changing things up to respond to the other players. For example, in the piece we learned as the Improv game–a special arrangement of An Eye for Optical Theory by Michael Nyman–some of the violinists had the option to take off on their own and do a solo. In response, the four hands piano might end up dropping out temporarily to let the violin have a moment. If one of the cellos started playing a noisy pattern, the piano might double that pattern to increase the volume. These are the kinds of things that actually make Improv games organized and fun.

    Concluding remarks

    These bite-sized skills and interesting points I picked up over the course of the chamber music workshop don’t just apply to these specific pieces or ensembles. They’re useful for all kinds of musical collaborations and composition projects, and they enable you to see the larger picture when it comes to composing music or playing with others. Through this workshop, I discovered some extremely useful insights when it comes to how string instruments are played, as the composition I created was performed by actual string players. The improvisation games added a nice touch and extra material to the chamber music performance; I also learned several new composition techniques that take advantage of the unique abilities of all instruments.

    Stay tuned for more updates and news!

  • Summer Update: AI Models, Flames of Rebellion, Chamber Music

    Summer Update: AI Models, Flames of Rebellion, Chamber Music

    With the academic year classes having come to a conclusion, the summer has officially started. I made a goal for myself back in late April, when things were still extremely busy, that I would try to push harder on the fourth and final book in the Flames of Rebellion series when classes ended. I had just published Book 3.5 on Amazon and was feeling motivated to wrap up the series; Book 4 already had about 9,000 words of content in it from the previews I had written.

    Now, as of late May, I’ve mostly achieved that goal. Over the past few days, I’ve put down over 3,000 words into Book 4, The Conquest of Piece, reaching over 12,000 words. Things have gotten significantly more interesting than the first few chapters, and I’m using a rather chaotic mind map with sticky notes to keep track of this book’s plot. In a couple of chapters, the plan is to create a serious plot twist by adding an evacuation situation of the Tranquility’s Ozridia base due to a bomb threat (or possible actual bomb). I’d also like to fully develop and flesh out Jonathan and Lily’s romance, as this is the last book now. I’ve already added some romantic cues in the first few chapters; I intend to make Jonathan’s upcoming birthday party the culmination of their relationship.

    On the subject of artificial intelligence and machine learning, I’ve moved onto a new Kaggle challenge: house price prediction. After failing horribly to get the sentiment analysis model to work, I stopped trying to extract answers from Claude and pivoted to something else. This house price prediction challenge involves the creation of a model to predict the prices of houses in the Iowa area based on various attributes, like number of bedrooms, pool quality, fence presence, square footage, etc. The dataset is quite large; there are seventy-nine features available, all with varying correlations to the central SalePrice target variable. So far, I’ve analyzed the data using some Seaborn scatterplots, generated correlation matrices to see which features to encode, and gotten started on cleaning the data (which has involved deleting outliers and imputing NA values). I can already tell that this challenge, while still labeled “introductory”, is slightly more intensive in terms of data preparation and analysis than the Kaggle Titanic challenge.

    I’m also loosely working on the virtual card deck project, where I’m attempting to create a virtual cards app that people can customize to fit their specific needs. Right now, I have a modal where you can input the number of decks, the name of each deck, the background art, and the titles/descriptions for the cards in the deck. Most of the data is persisted, and the modal seems to be behave as expected. However, I’ve been running into trouble getting all the data to save to local Storage, not just the number of decks. I’ve asked lots of questions of Microsoft Copilot, but no real results have come yet. This project is one of the most complex undertakings for me yet when it comes to web design, HTML, and JavaScript, so I’m not expecting it to work perfectly for many more months.

    Tomorrow, I’m starting a chamber music perspectives (CMP) camp, which will run for about a week and a half and take place from 1:00 PM to 5:00 PM. This camp involves not only a series of small ensemble performances (piano trio and string quartet size), but also some composition masterclasses and the opportunity to compose a piece of your own for the ensemble to play. This will be the “Final Project”, as it’s been dubbed; it looks like this camp will be very fast-paced and packed with activities. This final project needs to be started from scratch on day one and completed by the tenth day, giving us less than two weeks to compose a fleshed-out, playable, and refined 3-5 minute piece. For context, it usually takes me about two months to compose a high-quality 5-minute multi-instrument piece; however, I only work about 45 minutes every other day. At this camp, we’ll likely spending at least an hour and a half every day on this final project.

    Some other miscellaneous endeavors from the past couple of weeks include an AI radio show, which I just finished today. This is the third such show I’ve completed now (well, fourth, if you count Why You Should Be Afraid of Physics Class, a 20-minute-long drama), and I’m using Fish Audio to generate all the voices. These shows generally run for 25-28 minutes, and this latest episode contains the guest host Sal Khan. You’re probably wondering: how did I possibly get Sal Khan to appear on a low-level AI-produced radio show? Because this isn’t an AI-produced show: the voices are all AI. I do the editing and the generating of the voices. Sal Khan is a cloned voice available on Fish Audio, and I’ve cloned a few others for use in these episodes. It’s quite an interesting process, actually. I’ll be using DaVinci Resolve’s Fairlight studio instead of the clunky Audacity to edit this show together. Hopefully it won’t be too much of a shock to use. (The video editor portion of DaVinci Resolve is actually quite easy to learn. I’ve put together quite a few videos with it now).

    Well, tomorrow’s going to be quite a busy day, with the starting of the CMP Chamber Music Perspectives camp. I’ll try to work on the AI models this weekend if possible, in addition to the usual (shortened) BeamNG Roleplay sessions. Stay tuned for more updates.

  • Kaggle Titanic Random Forest Model: Summary and Comments

    Kaggle Titanic Random Forest Model: Summary and Comments

    This month, I finished the final series of hyperparameter tuning and optimization on the Kaggle Titanic Random Forest Model. I constructed this model for the Kaggle Machine Learning from Disaster challenge, which is an introductory-level machine learning prediction competition. Users are supposed to construct a model that predicts whether or not a given person, among 800 people, survived the Titanic shipwreck. This was my first attempt at crafting a new AI model from (close to) scratch, given a fully-featured dataset. Although I probably could achieve higher Kaggle scores by trying out different architectures, I didn’t want to spend the entire year on one challenge, and left the model at a 0.788 public score.

    In this post, I explore some of the code and the inner workings behind the Kaggle Random Forest model. I also dive into a few of the challenges I encountered along the way. If you’d like to work off the model framework I’ve put on GitHub, you can feel free to do that, but I’d strongly recommend against it because I haven’t yet taken the time to make the code fully understandable and customizable. (Also, a serious Kaggle competitor will likely strive for a better model architecture that achieves a higher public score, so please find your own setup).

    Model Setup: From Logistic Regression to Random Forest

    Initially, I started off with a simple logistic regression model loosely based on a Kaggle starter tutorial. For the most part, the tutorial model didn’t involve any careful feature engineering, and primarily relied on the passenger name, class, sex, age, and fare (several of the most important features in the dataset). It used elementary techniques to learn patterns between these features and the survival, and this base model only achieved an accuracy of about 0.74 inside the code cell.

    Immediately realizing that I needed to do more with the model, I switched to a Random Forest architecture, as it seemed to be highly recommended for binary classification problems like this one. The important part about Random Forest is that the model automatically determines which features are the most important, regressing through all the available features in a large “tree”. So I was able to feed it a wide variety of featuers and have it discover the most important connections: the prominent features ended up being Sex, Pclass, and Fare/Age.

    The percentage of women who survived the Titanic shipwreck (in the sample data) was significantly higher than the percetange of men.

    As shown in the image above, I was able to discover that a significantly higher percentage of women survived than men (74% vs 18%). Historically, this was due to the “women and children first” directive on the ship. I used this basic pattern to train the original model, and the more advanced Random Forest model uncovered this connection as well. I prioritized the Sex feature (in addition to Pclass and Fare/Age) when feeding the features to the model.

    Advanced Feature Engineering: the Cabin Data

    When the Random Forest model based only on Sex, Pclass, and Fare/Age didn’t perform very well, I realized I was going to have to do a lot more feature engineering. After all, the data contains several features, ranging from the number of parents and children aboard the Titanic, to the passenger’s Ticket number, and the cabin number where the passenger stayed.

    Since the location of the passenger aboard the vessel seemed like an important data point, I constructed the next round of feature engineering around the Cabin column (and created a few new helpful features from the existing data, like IsAlone or FamilySize). I learned quite a bit about proper feature engineering practices in the process; with the help of Copilot and some Google searches, I was able to construct new engineered data for the model to train on.

    I also built a function to make observations on the correlation between people with no cabin data (we don’t know where they stayed) and passenger class (1st, 2nd, or 3rd class). I wrote these observations at the top of the rather long code cell shown below, and this info actually ended up being helpful in situations where the cabin data was missing.

    A sample of the very long code cell used to engineer the Cabin feature data

    Hyperparameter Tuning (with RandomizedSearchCV)

    After retraining the model with the engineered Cabin data, I was getting much-improved accuracy in the notebook (about 0.82 vs 0.79), but the Kaggle score wasn’t changing. I figured I was going to have to do some more serious hyperparameter tuning to boost the score, which usually only reacts to large-scale prediction changes.

    At first, I attempted to tune most of the important parameters (n_estimators, max_depth, max_features) by hand, doing Google searches to figure out the best values for a Random Forest model. But this quickly became tedious, as I had to retrain the model every time I made a minor change so see if it did anything. Instead, I switched to RandomizedSearchCV, which is an algorithmic method of finding a model’s best parameters povided by the Python library sklearn.

    Using RandomizedSearchCV was relatively simple (as shown in the code cell below). All I had to do was set up a parameter grid, where I told RandomizedSearchCV which hyperparameters I wanted it to optimize. Then, I asked the algorithm to fit on the training datasets of the model, and then output the best parameters using a simple print() statement. From there, I was able to go back and drop in the fine-tuned parameters to the final model. The parameter-discovery process did take a little while, so I had to set n_jobs = -1 to ensure the algorithm ran on all CPU cores.

    After the hyperparameter tuning, the model achieved 0.84 validation accuracy in the notebook, and a Kaggle public score of 0.788, which is in the mid-to-upper-tier for these kinds of Random Forest models. I haven’t been able to move above this score since then; however, if I manage to do so, I will update this blog post with those details.

    The model’s final accuracy, precision, and recall report after the final stage of hyperparameter tuning.

    To view this entire Titanic project (and the code files) on GitHub, click here. However, the code is primarily intended for reference, not for drop-in usage in a brand-new project.