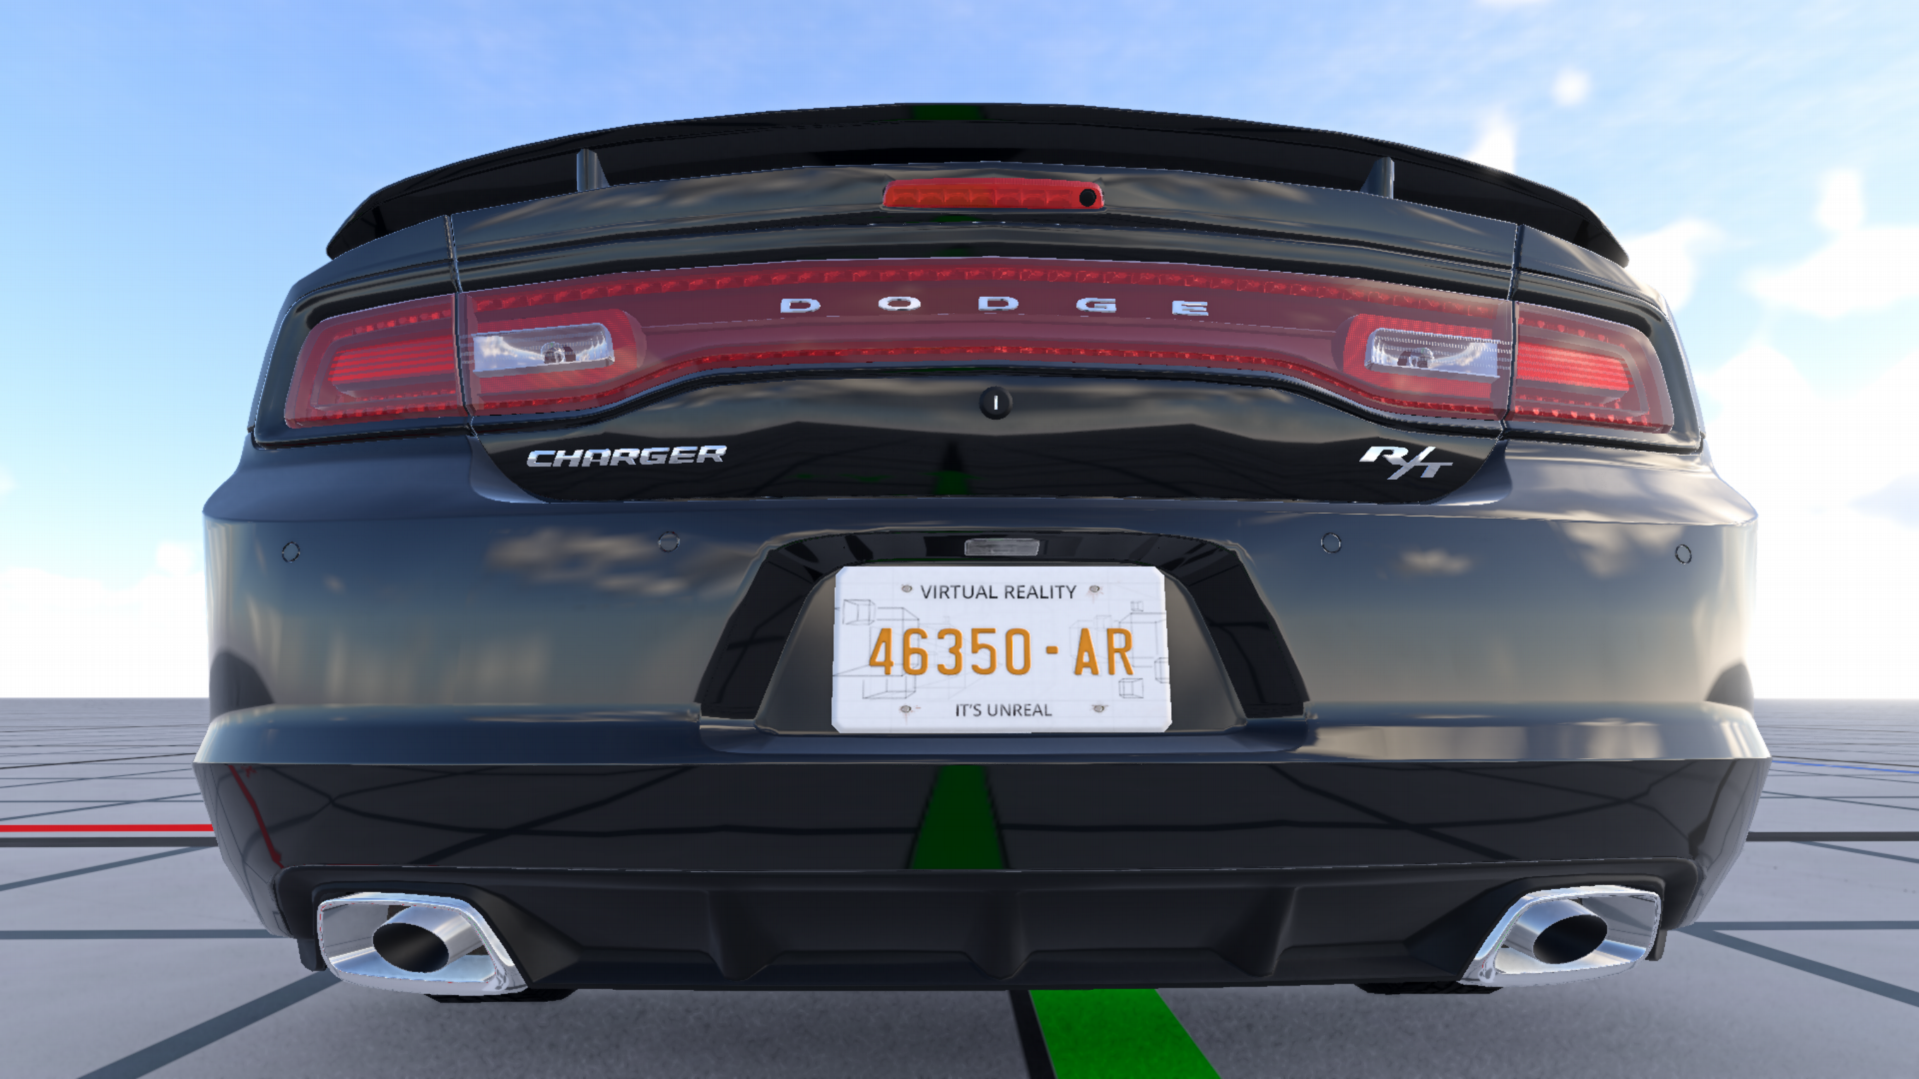
This month’s update is vastly more successful and Blender-oriented than the previous few; instead of just engaging in long back-and-forth chat conversations and never really getting anywhere with a model, I’ve finally completed my first small Blender/BeamNG project: adding a missing badge to a vehicle mod.
A couple weeks ago, while looking for new and interesting real-vehicle mods to try out in BeamNG, I downloaded the 2011-2014 Dodge Charger mod by the popular creators Flanje and NMG. Being a mod from ModLand, I didn’t have high expectations for the quality or accuracy; however, I was somewhat surprised when the vehicle loaded in-game looking pretty close to the actual vehicle. The interior was mostly well-modeled, the exterior was accurate, and there were no glitching parts.
However, there were a few big problems. First, the sound was completely wrong (which is a totally separate small BeamNG engineering project I completed last week), and second, there were no badges beyond the standard “Charger” and “Dodge” lettering on the trunk. While this wasn’t a huge gameplay issue, it seriously broke the immersion when you loaded in a stock R/T configuration and there wasn’t any R/T badge on the trunk. Why would a modder go to the trouble of modeling most of the other standard badges on the vehicle, but leave out a few random important ones?
Modeling the R/T badge
This became the premise for my next big Blender project: “finish the modder’s work” by modeling the other badges, including the R/T badge, the HEMI side badge, and potentially the SXT/SRT8 trunk emblems as well if I had time. I started last Monday (October 5) by pulling down some reference images off of sellers on Ebay, finding straight-on shots of the R/T badge first, since that was my top priority. I actually found a pretty good image without too much digging, which (unfortunately) I’m not sure I can say confidently about the other badges. To ensure that I was going to create a badge sized correctly, I got the actual dimensions of the R/T badge and scaled the image such that the badge in the photo matched those dimensions.
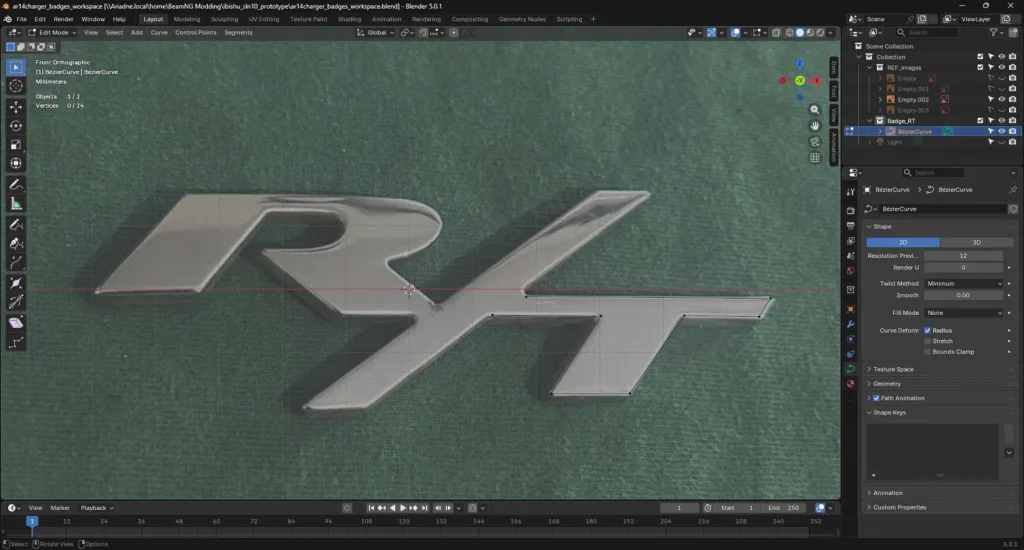
So I was able to get started pretty quickly in Blender; to begin tracing the badge in the software, I didn’t hunt for custom fonts or try to type out the letters and the slash, because that would be way too imprecise. I found out that the better solution for modeling a badge is to start with a Bezier curve, which allows you to place vertices at key points on the badge and connect them via a curved line. This sounded like a great setup for the R/T badge, so I Ctrl+right-clicked on the corners of the R, slash, and T to get a total of about 27 vertices (81 with the triple baking).
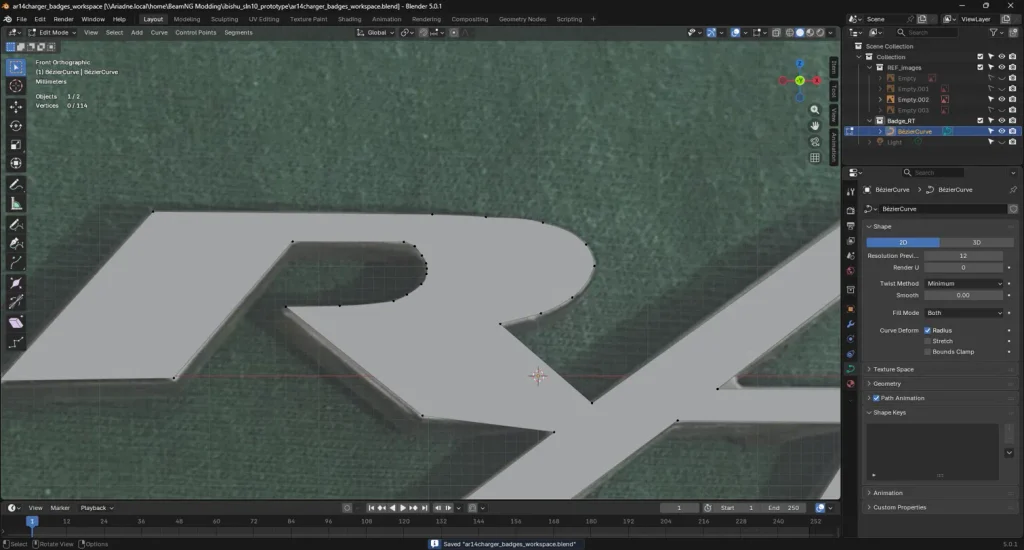
Once I had vertices in for all of the important corners of the badge, it was time to smooth the points around the bowl of the R, as they were quite jagged to start due to not enough resolution. To do this, I added additional points to the arc around the bowl via a Subdivide operation, moved them onto the lip, and spaced them out equally to ensure that the curve traced the bowl properly. This was the most tedious step of the process, as it required ultra-precise mouse movements and constant tweaking as points gradually got out of line. I spent about a day on this step (likely Tuesday by now) before I got to the smoothed-over version of the R, shown below with the curve in solid form:
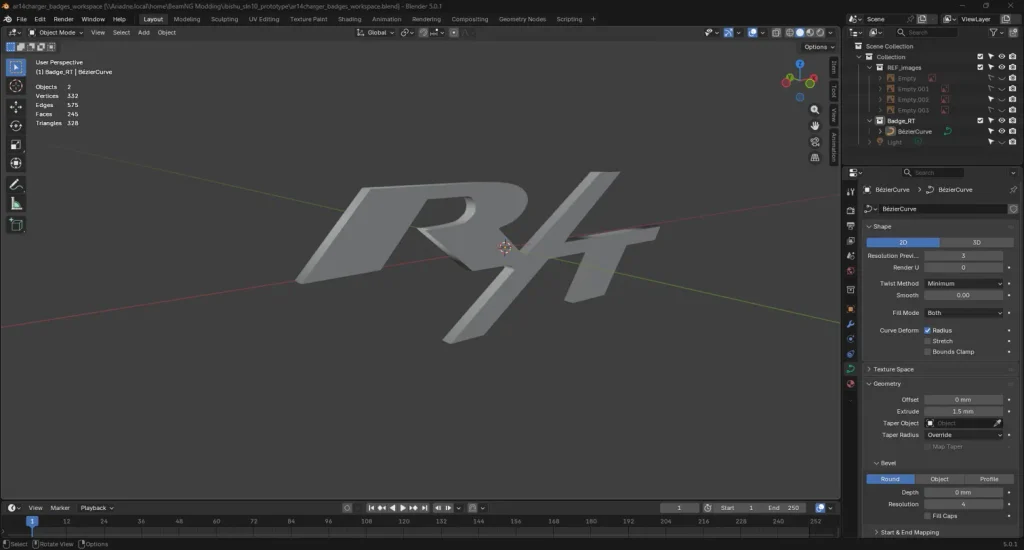
Now that the curve was relatively smoothed-over (with a couple more areas to correct before the next step, which I’m sure you can identify from the above photo), it was time to ditch the reference image and convert the curve to a mesh. I honestly wasn’t expecting much at this point, since I had been working solely with that image and had no real experience seeing what this transformation would look like. However, I was quite surprised when I changed it to a mesh and discovered that the badge actually looked pretty convincing. To ensure that the depth (or thickness) of the badge was correct, I extruded it by 1.5mm, and confirmed that it looked accurate afterwards. The result of this is shown below.
After this step, I performed some quick checks on the mesh (Non-Manifold, origin and position verifications), and moved into the UV-mapping/shading phase. The badge should obviously be chrome, but to get to that part, I first had to apply a Shade Smooth by Angle modifier to ensure that the chrome wouldn’t be bent or reflected in odd ways to the jagged edges on the tip of the T, for example. I applied the modifier to 30 degrees to ensure that nothing seemed too subdivided still. I also generated a simple UV map of the badge in Blender, resulting in an interesting-looking diagram of the islands and squares representing the different caps of the badge.
To actually apply the material, I used the already-existing chrome material provided by the mod, which had been used for the “Charger” left-side badge and the “Dodge” lettering. I simply went to the Materials tab in Blender, added this new material (ensuring that the name matched exactly with what was in the mod’s materials.json file), and turned up the Chrominess setting. Nothing changed in the viewport, of course, since the chrome material would only be rendered in-game, after export. At this point (this was around Thursday/Friday), I was pretty much ready to export the badge. However, I observed an issue with the bowl of the “R” just before doing so: there was still a slight facet on the bowl, making it appear as if it had been creased (shown below).
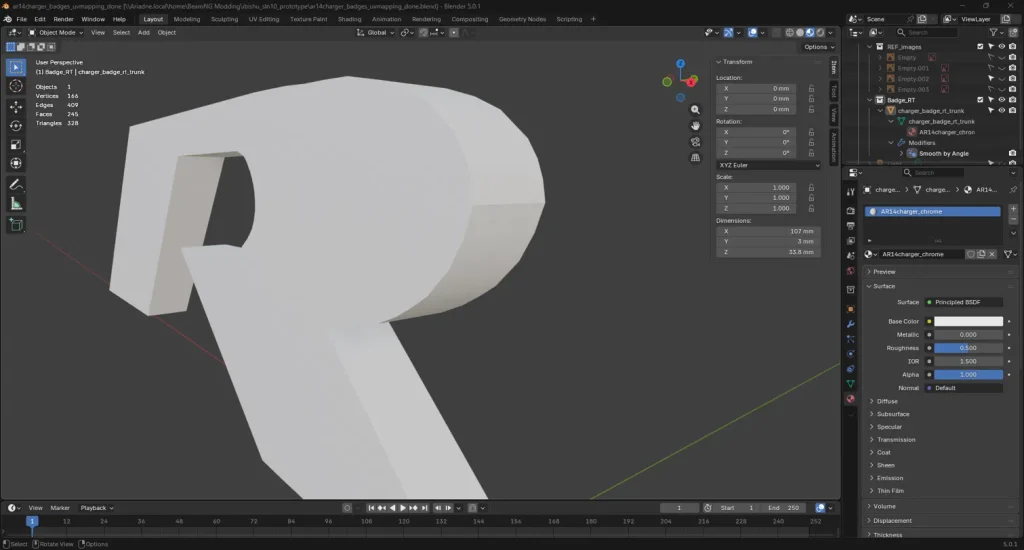
While it might not be so noticeable in-game, there was a possibility it could mess up the chrome reflections, as with previous issues. To fix it, I raised the angle on the “Smooth by Angle” modifier to 45 degrees, and the facet disappeared. I also turned on the “Ignore Sharpness” setting, which improved the result even further. With this change completed, I baked (applied) the modifier, hid the reference objects (they’ll have their time later!) and exported as a .dae file for BeamNG.
Sidenote: If you’re wondering how in hell I got Blender 5.0.1 to export a .dae file, which was supposedly discontinued many major versions ago, here’s the answer. I’m using a custom Blender add-in from the BeamNG modder Grille, which adds the ability to both import and export .cdae/.dae files. This is a vital tool for modern BeamNG modders looking to use the latest Blender versions, since the Blender developers have thrown native .dae support in the trash can and never looked back.
With the badge exported, there was only one phase left before it could have a chance of appearing on the vehicle in-game: the coding phase.
Setting up the JBeam files
To ensure that BeamNG recognized the badge’s existence and put it in the right location, I added a simple line to the mod’s Trunk jbeam file, since that’s where the badge ends up going. (See below for a real-world image of the 2011-2014 Charger R/T’s trunk lid).
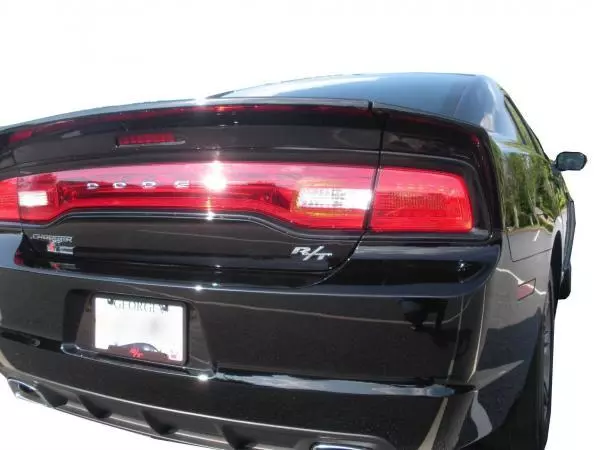

This line would add an additional component to the trunk, called “charger_badge_rt_trunk”, map it to the trunk part, and set the pos and rot values for the badge (position and rotation). The line was hardcoded in the flexbodies section of the JBeam file; my future goal is to have the badge set up as a slot in the vehicle configuration menu so you can choose to apply the badge or not. I used some dummy pos numbers at first before loading in the game, just to see how it would load in. Surprisingly, those guesses weren’t far off, but there were a couple of problems.
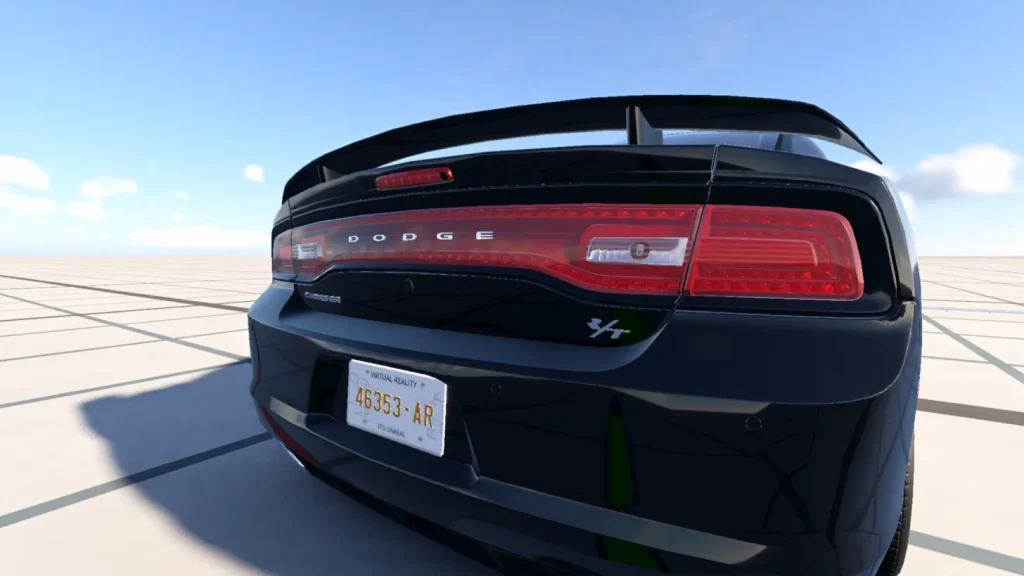
Well, first of all, the left edge of the R was clipping through the trunk material. Second, the badge was positioned a little bit too low; in the real-world image above, you can see it’s a little bit closer to the bottom edge of the taillight. I thought these were going to be simple position issues–and they technically were–but it took over an hour of constant tweaking and screaming back and forth between Blender and BeamNG to get it to look correctly-positioned. The result of this intermediary screeching is shown below:
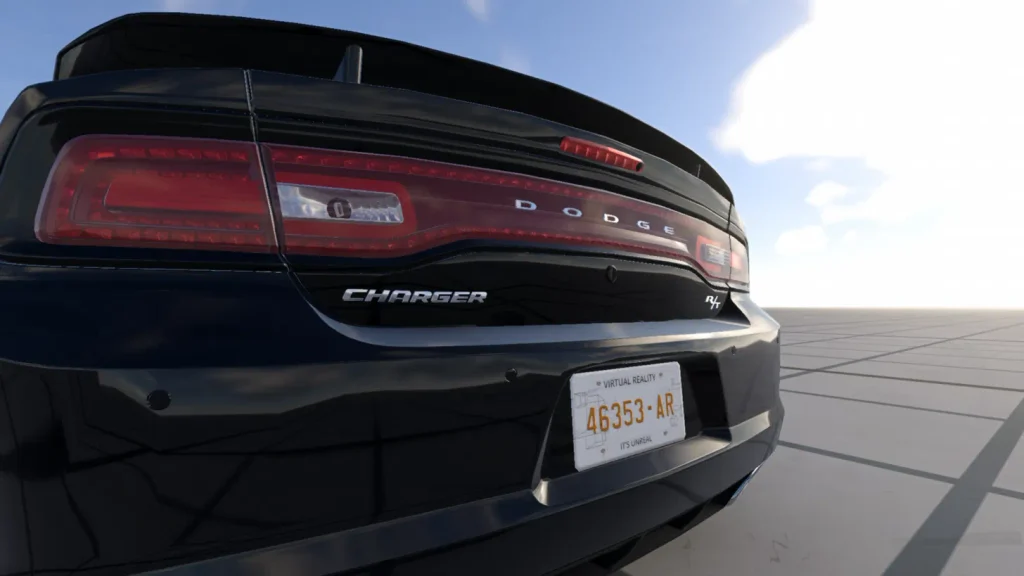
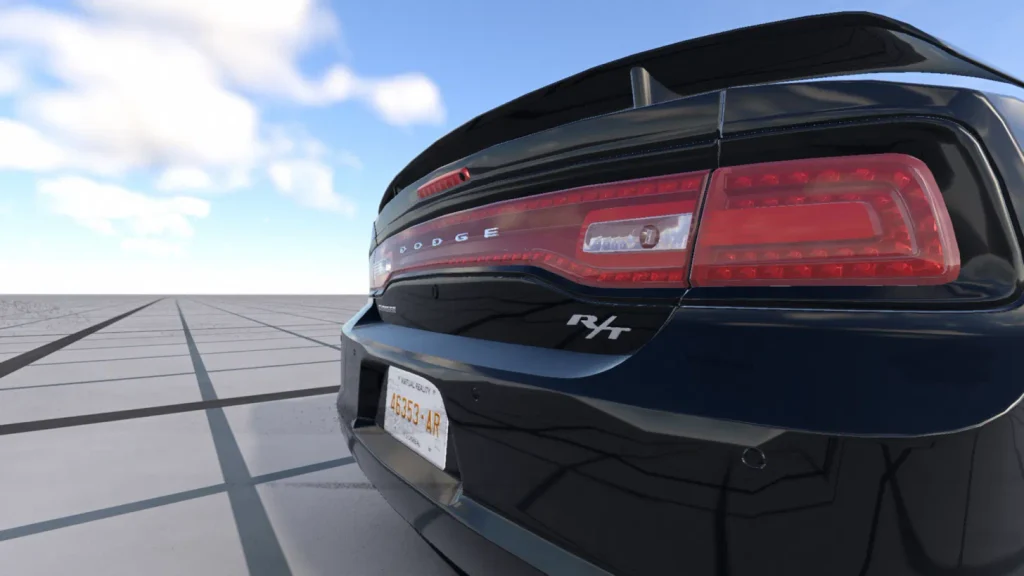
Now, you might be noticing something about this current badge. While it looks pretty convincing (and probably wouldn’t raise any suspicion when viewed from a greater distance), it also looks a little flat and dull from certain angles. Of course, this is a game, and the reflections can only go so far, but when comparing the appearance of the R/T badge to the Charger badge on the left, there’s a slight difference in the roudedness, or chrominess, of the badge. I noticed this as well after the preliminary tests; to fix this, I ended up applying a 0.5mm bevel/chamfer on the badge via Blender.
However, I worried this wouldn’t be enough. Even previewing the badge again in Blender, it seemed that it didn’t really change all that much (although the numbers and statistics in the upper-left corner directly confirmed that something had happened). So I went with a different strategy: apply a bend to the badge so that it sticks out in the middle region vertically, and curves outward to match the flow of the trunk lid. I hoped that this would help it capture a bit more of the gloss, as I noticed a similar kind of bending on the Charger badge upon close inspection. I used Blender’s Simple Deform modifier to make this change, doing one on the X-axis and one on the Z-axis. The X-axis curve went to an angle of about 15 degrees, and the Z-axis I kept at 8 degrees, since I noticed some strange streaking/chrome aberrations on the surface due to the competing bends if I went too far above that.
After re-exporting the badge and loading it into the game, I realized that the change had made a significnat improvement. These photos can’t really do justice here due to their smaller size and WordPress compression, but in-game, they looked quite a bit better than the initial pass.
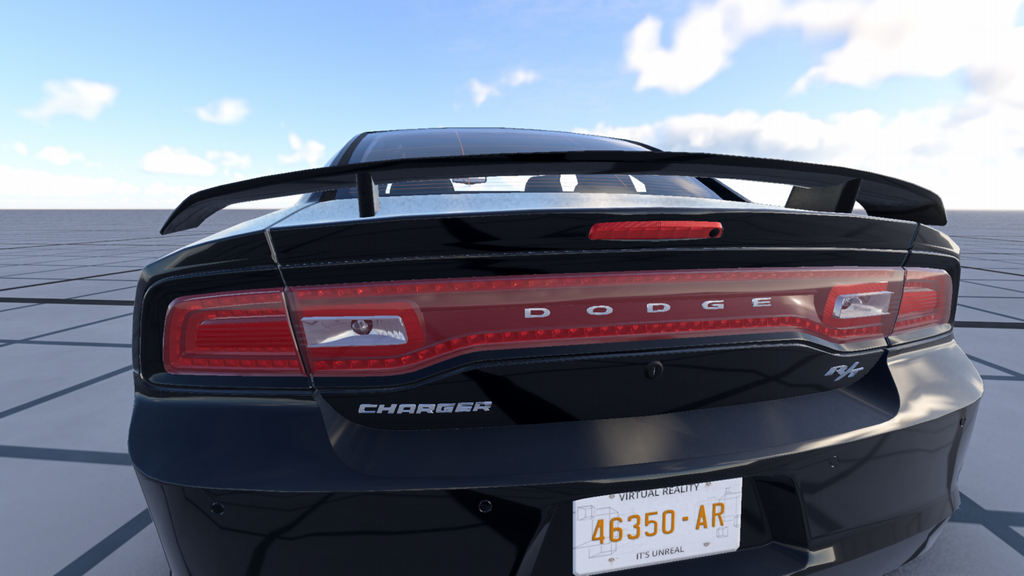
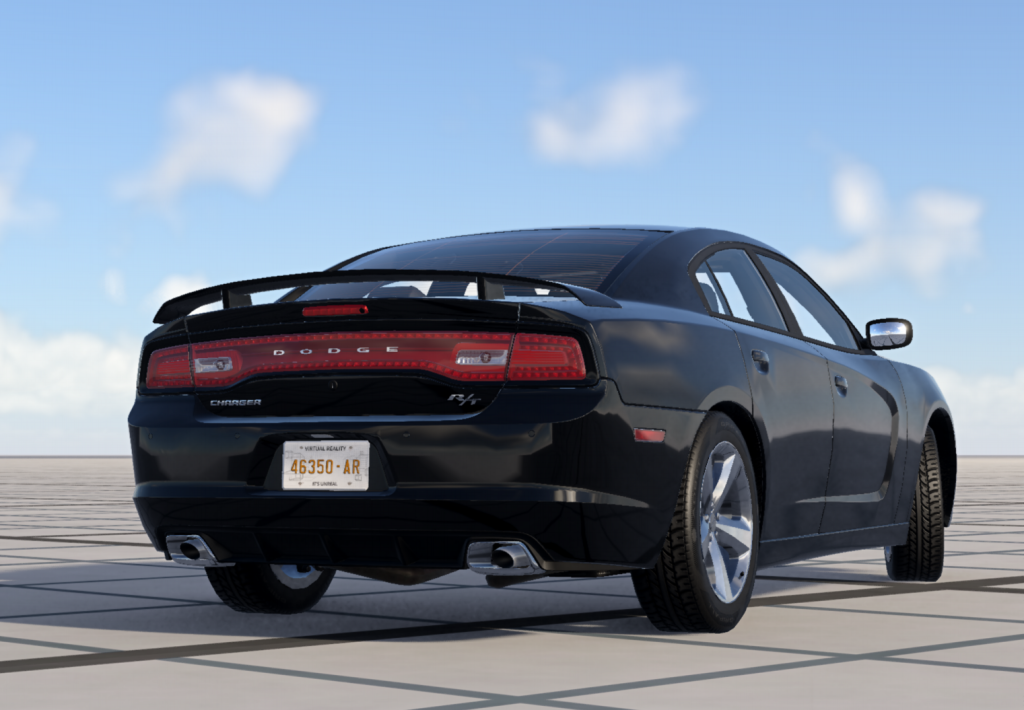
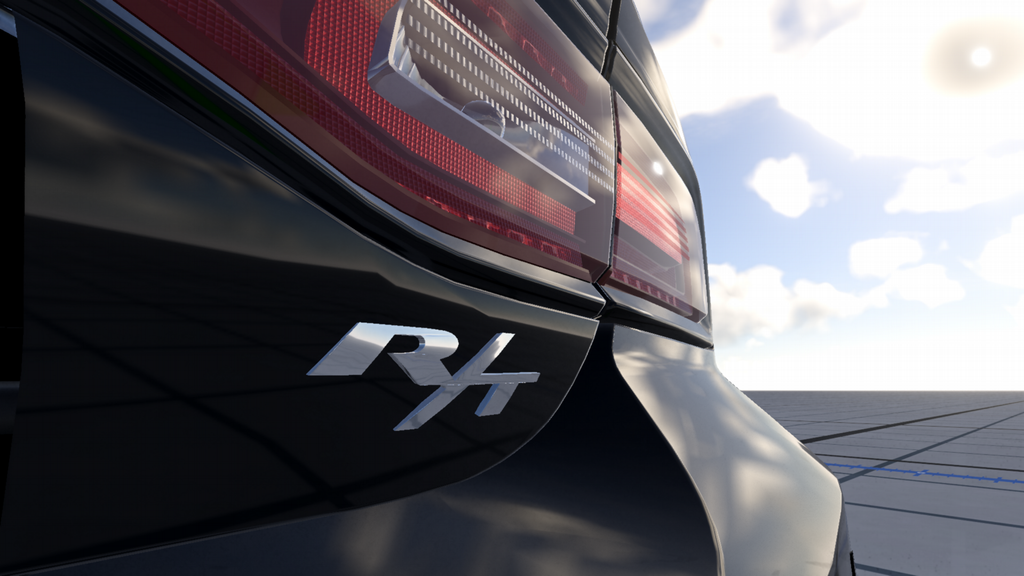
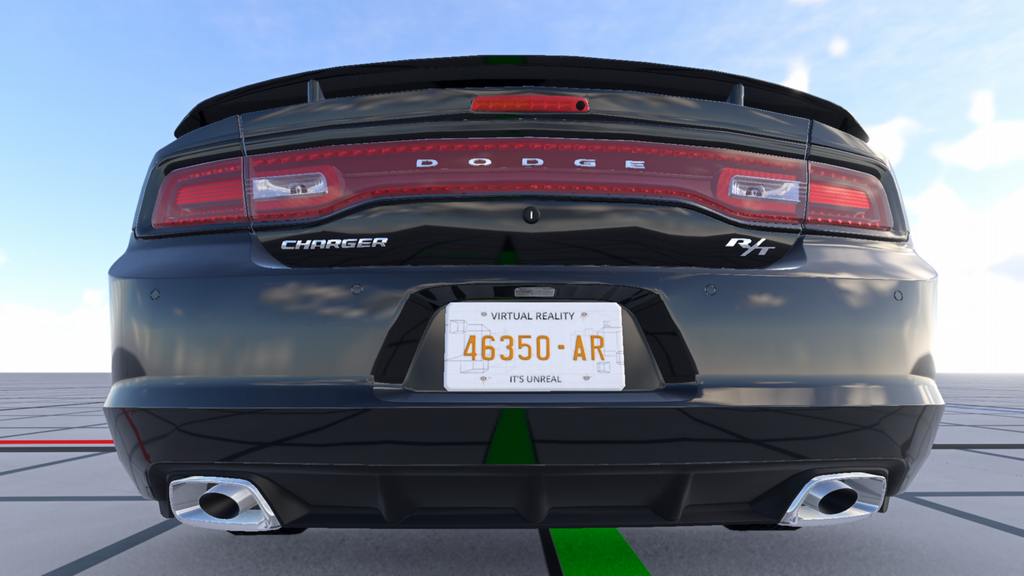
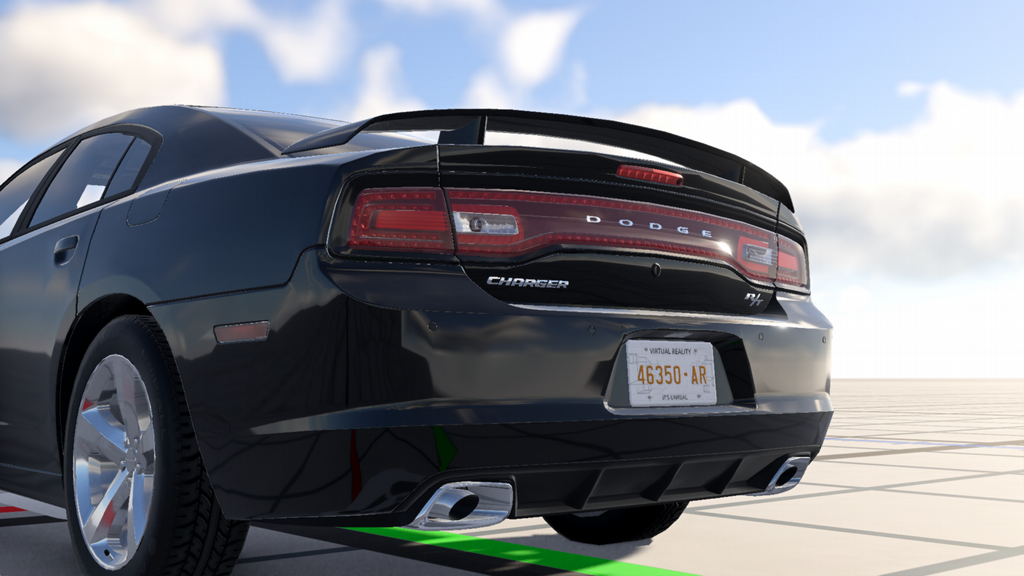
And with that, I approved the final version of the R/T badge, saved all the changes, and closed out of the first badge-modeling phase. From a distance and close-up, the badge looked more than convincing: the reflection and bevel on the model worked wonders for the chrome appearance. I’ll now be taking some more natural photos in an actual map (not the Gridmap testing area), such as the parking garage in West Coast, USA.
Next steps
While the logical next step is to start working on the HEMI side badge, there is an additional thing that I’d like to ideally take care of before I get the HEMI badge into the game. Right now, the R/T badge loads onto the vehicle no matter what configuration you choose; there’s no taking it off since it’s hard-coded into the flexbodies section of the trunk JBeam file. I’d like to find a way to create an additional slot in the Vehicle Configurator, something like “Trunk Trim Lettering”, that allows you to choose between Empty, R/T, SXT (potentially), and SRT8 (potentially). This would be a more coding-heavy undertaking, which can become quite problematic in BeamNG due to the strict syntax requirements, so we’ll see how that goes.
The reason why I’d like to have that done before the HEMI badge goes on is I don’t want the two badges to start competing and causing conflicts if I have to hardcode both of them onto the vehicle. It would be better to have a slot for the side badge and a slot for the trunk badge, which is the accepted convention for BeamNG mods.
Well, as this “badge-engineering” project gets further underway, and I start working into the side badge as well, I’ll post more updates and photos on here throughout the process. Hopefully things won’t fall apart once things start getting vastly more complicated–the black edges on that HEMI badge look quite difficult. Stay tuned for more info!